
Creating a Certificate
Creating a Certificate
In this article:
- Overview
- How to create a Certificate
- Linking the Certificate to a learning
- Attaching a certificate file
- Things to keep in mind
- FAQs
- Who can do this
Overview
Certificates are the recognitions your learners earn for completing learning in SuperPath. Before you can award one, you create the Certificate itself — giving it a name, and optionally a description, an expiry period, provider details, an image, and a PDF file that's attached when it's awarded.
Certificates are created on the Certificates page in your settings, and can be linked to the learning that awards them.
How to create a Certificate
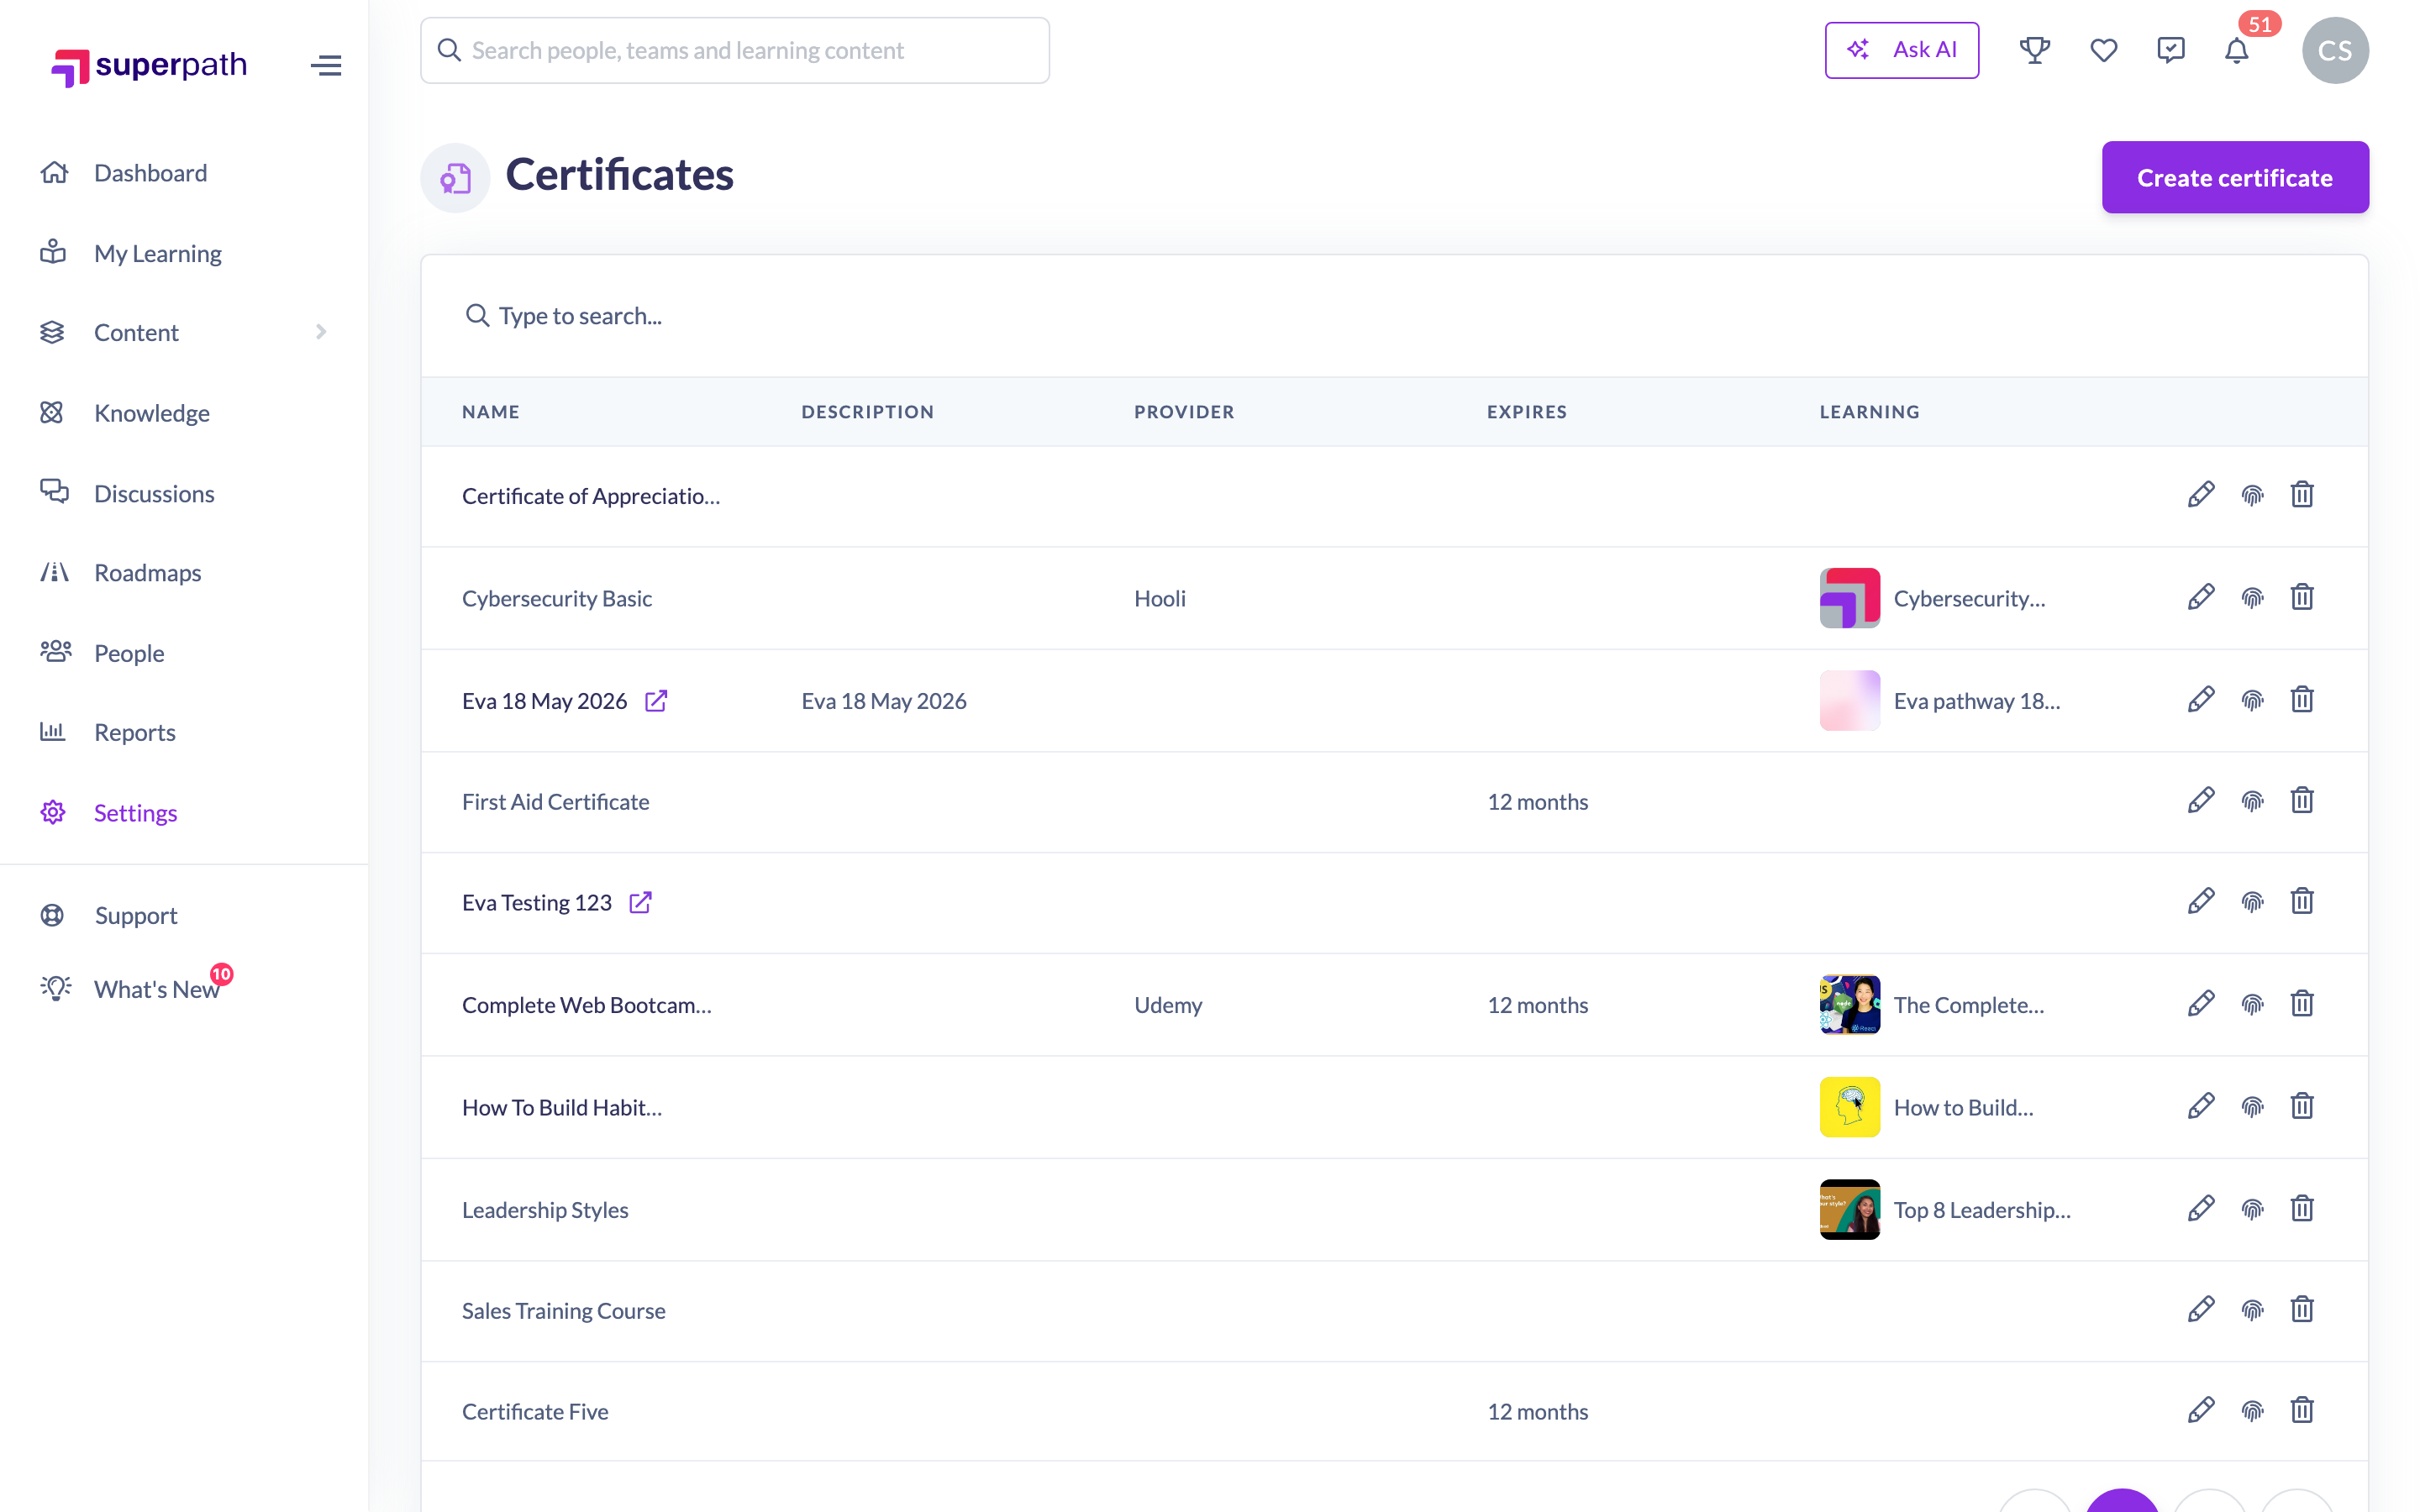
- Go to Settings → Features.
- Find the Certificates section and click Manage Certificates.
- Click Create certificate.
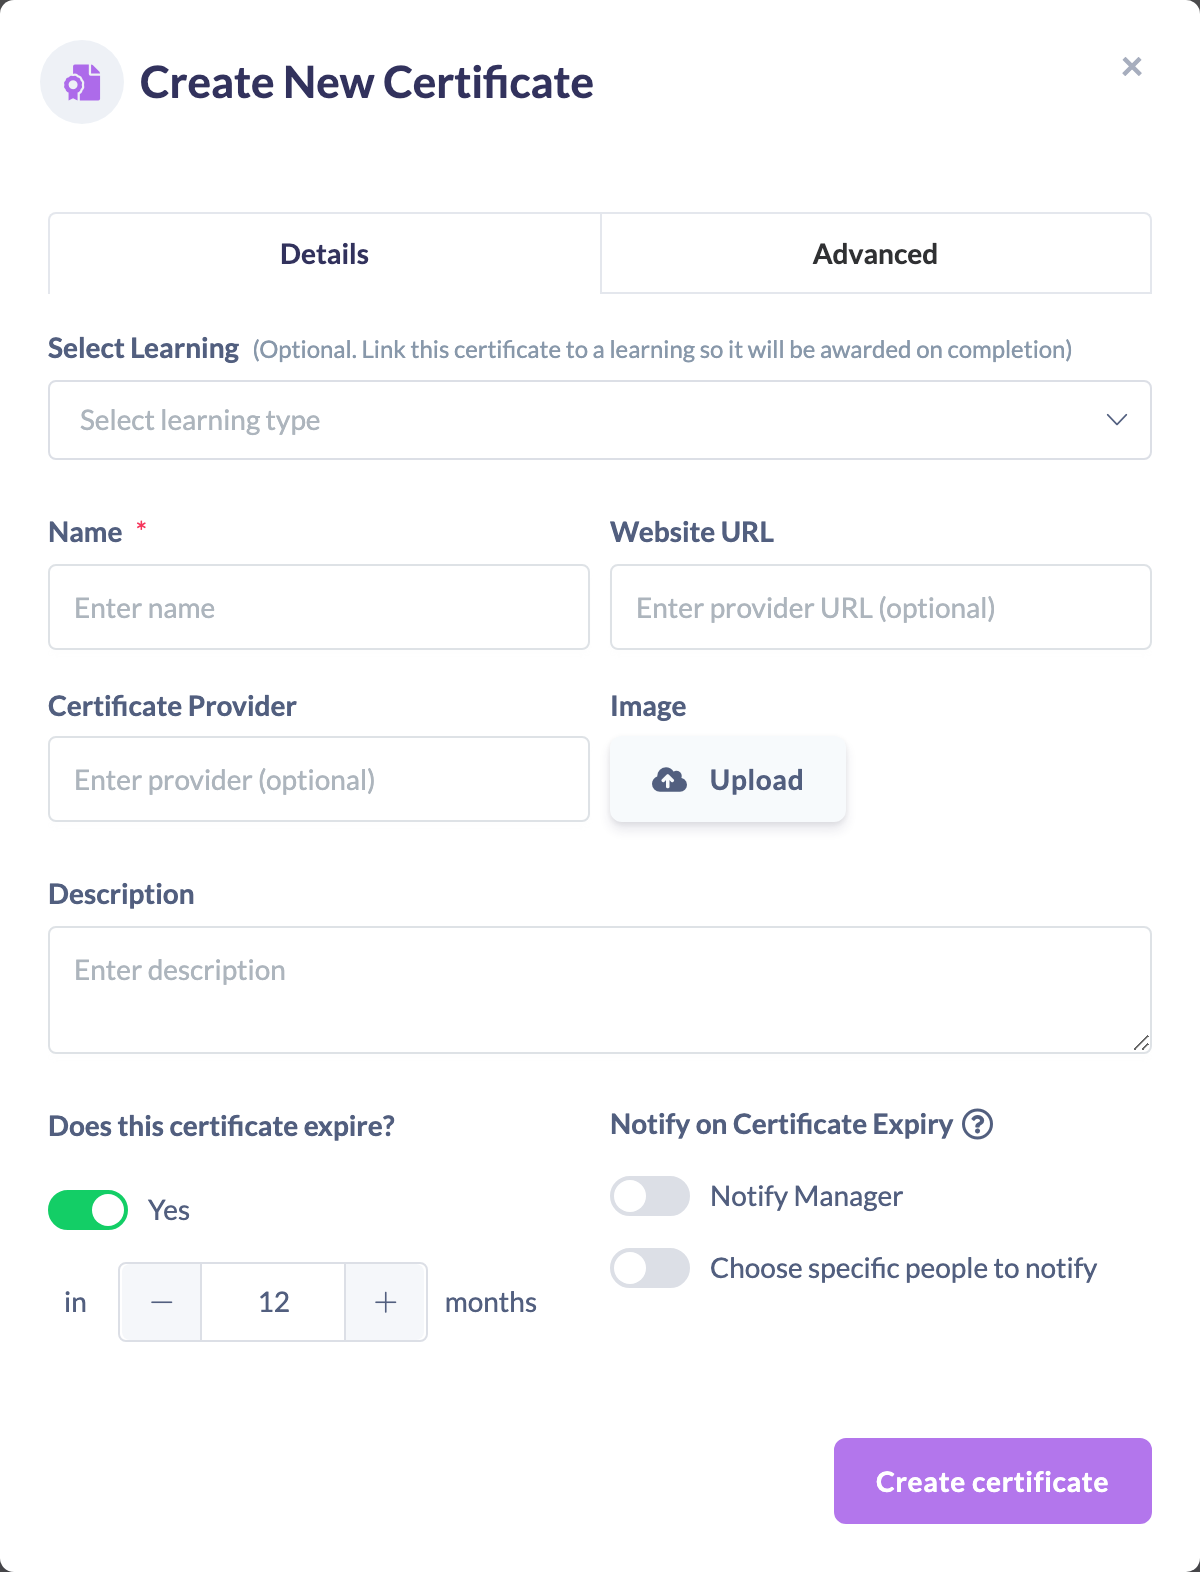
- On the Details tab, click the Enter name field and type the name of the Certificate. This is the only required field.
- If the Certificate expires, turn on Does this certificate expire? and enter the number of months it stays valid.
- Optionally add a Description, a Certificate Provider and a provider Website URL.
- Optionally upload an Icon image, which appears beside the Certificate wherever it's listed.
- If the Certificate expires, you can choose who's reminded before it lapses under Notify on Certificate Expiry.
- Click Create certificate.
Linking the Certificate to a learning
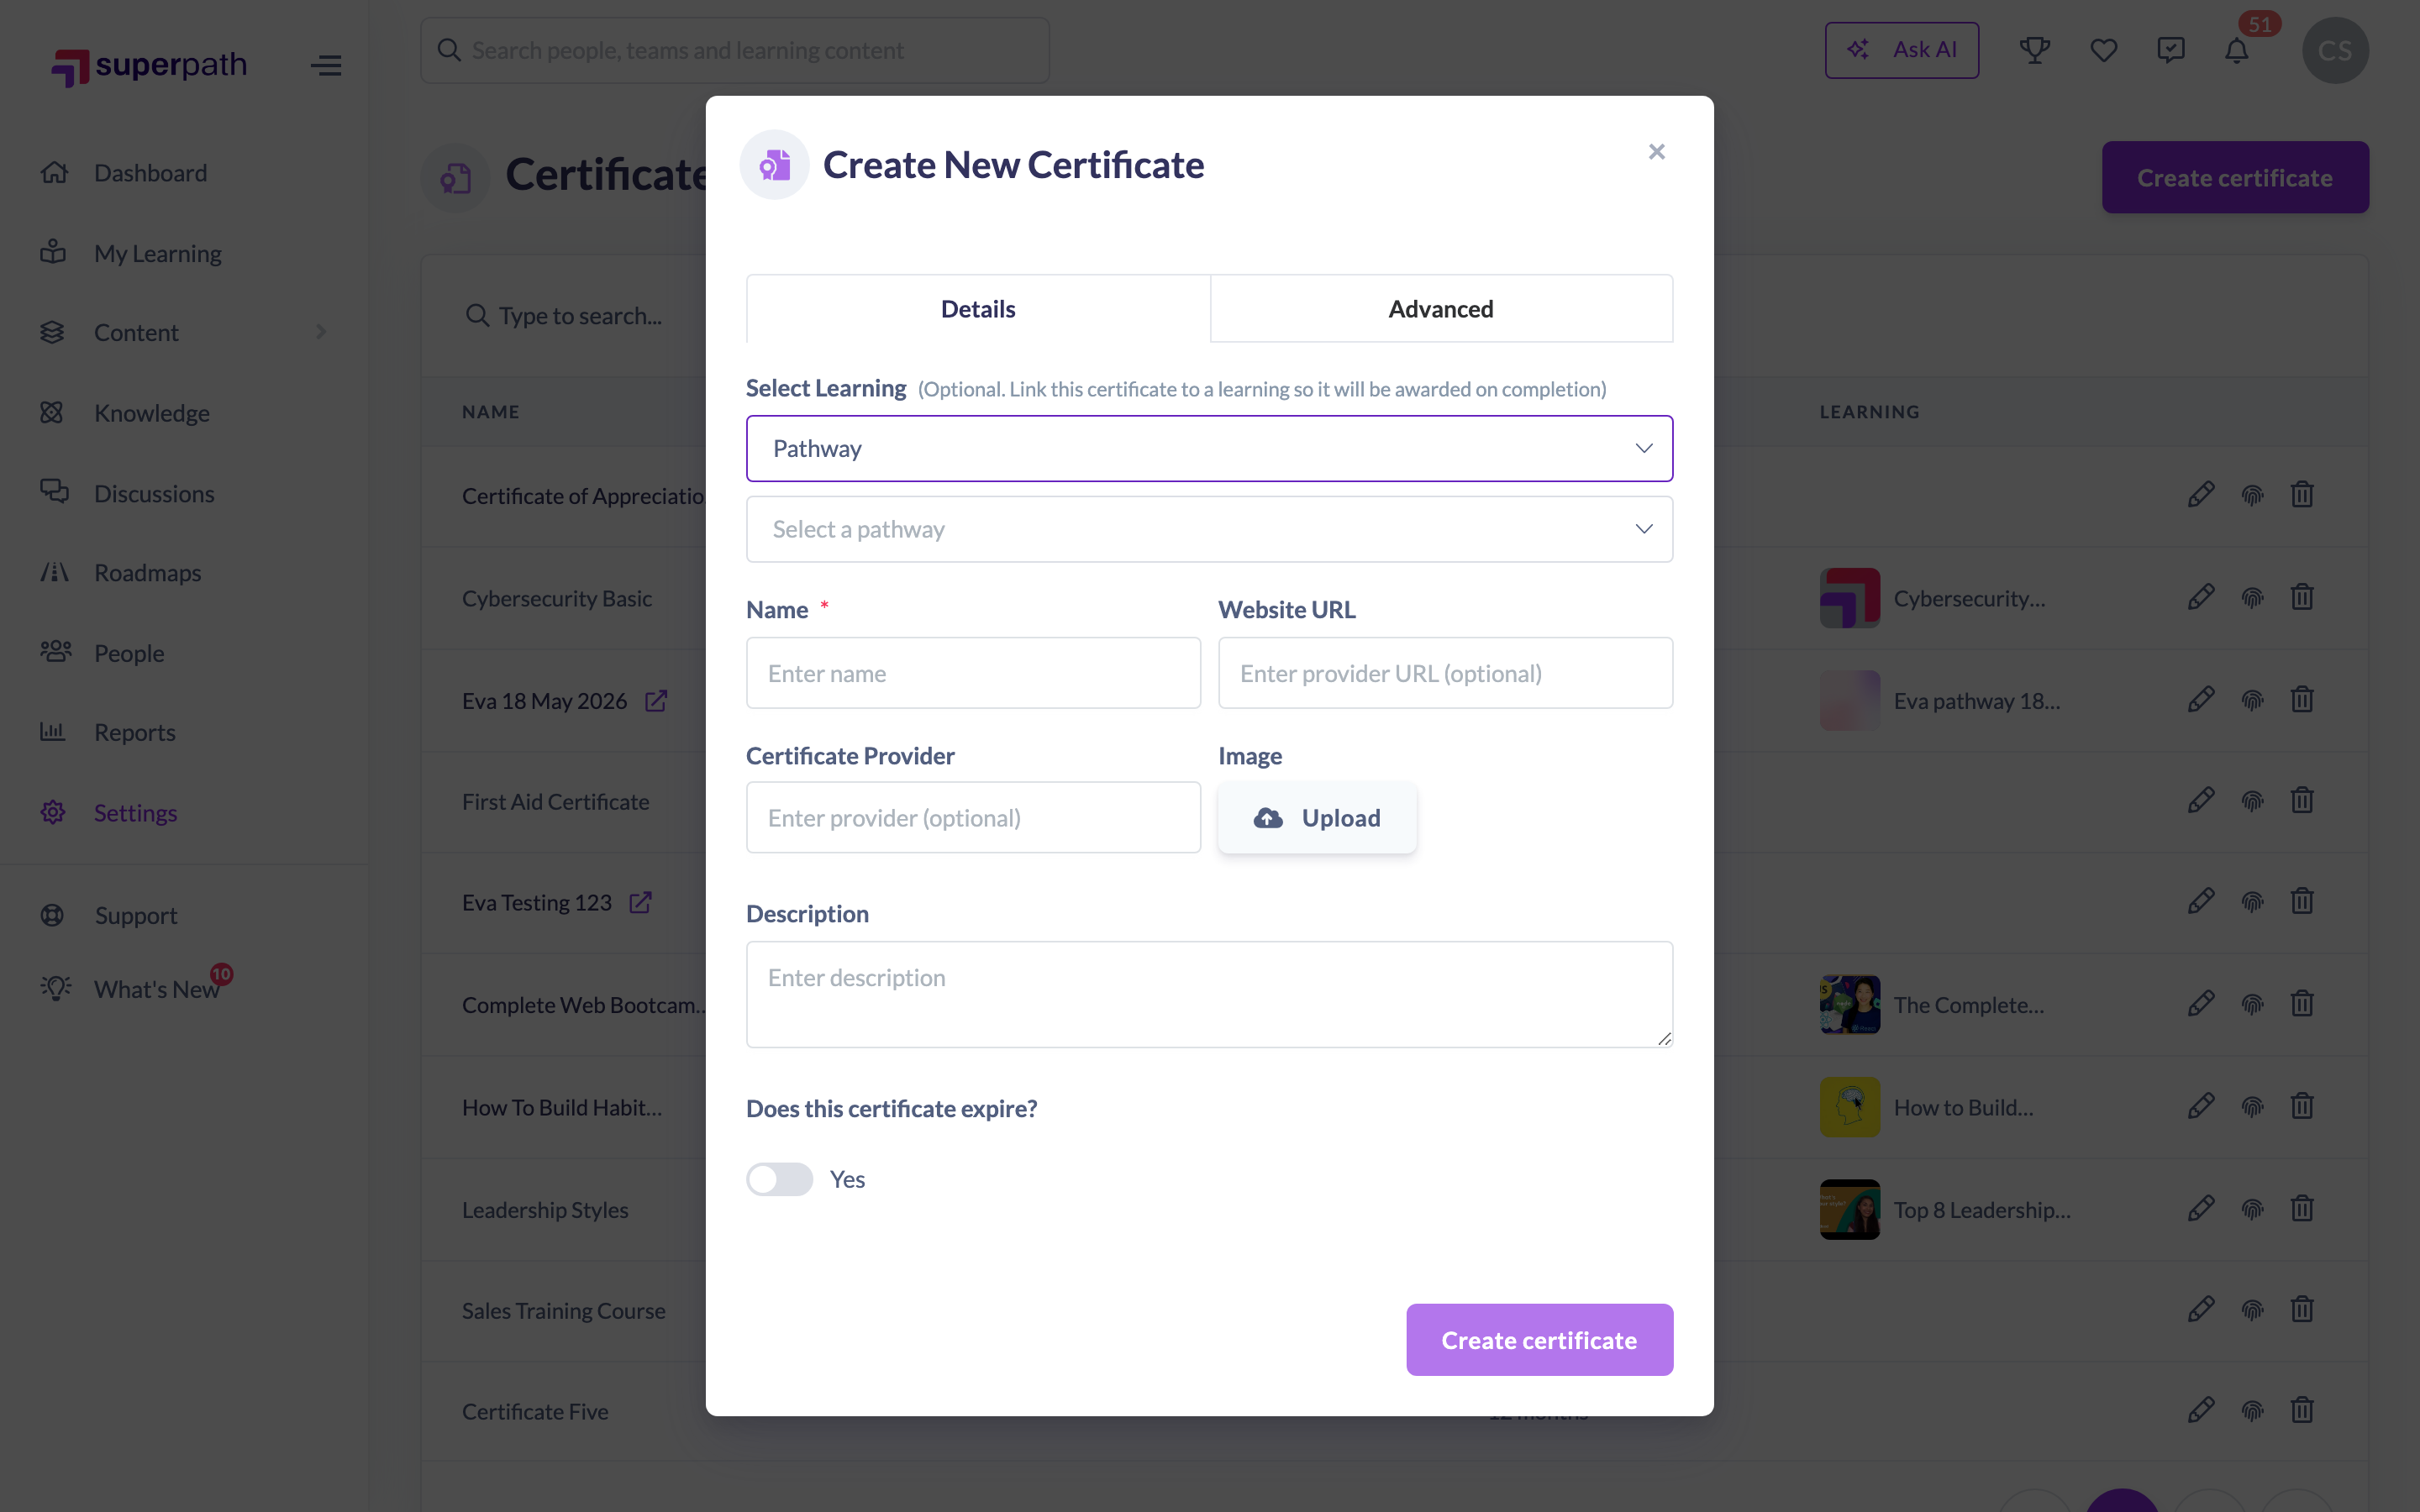
A Certificate is awarded automatically when someone completes the learning it's attached to. Use Select Learning at the top of the Details tab to make that link:
- Choose a learning type — Content, Pathway or Event.
- Pick the learning itself. Pathways and Events are chosen from a dropdown; for Content you search your Library.
Leaving it empty is fine — you'll get a Certificate that can be awarded by hand, or linked to a learning later. You can also attach a Certificate from the learning's own edit screen instead; see Adding a Certificate to an Event, Learning or Pathway.
Attaching a certificate file
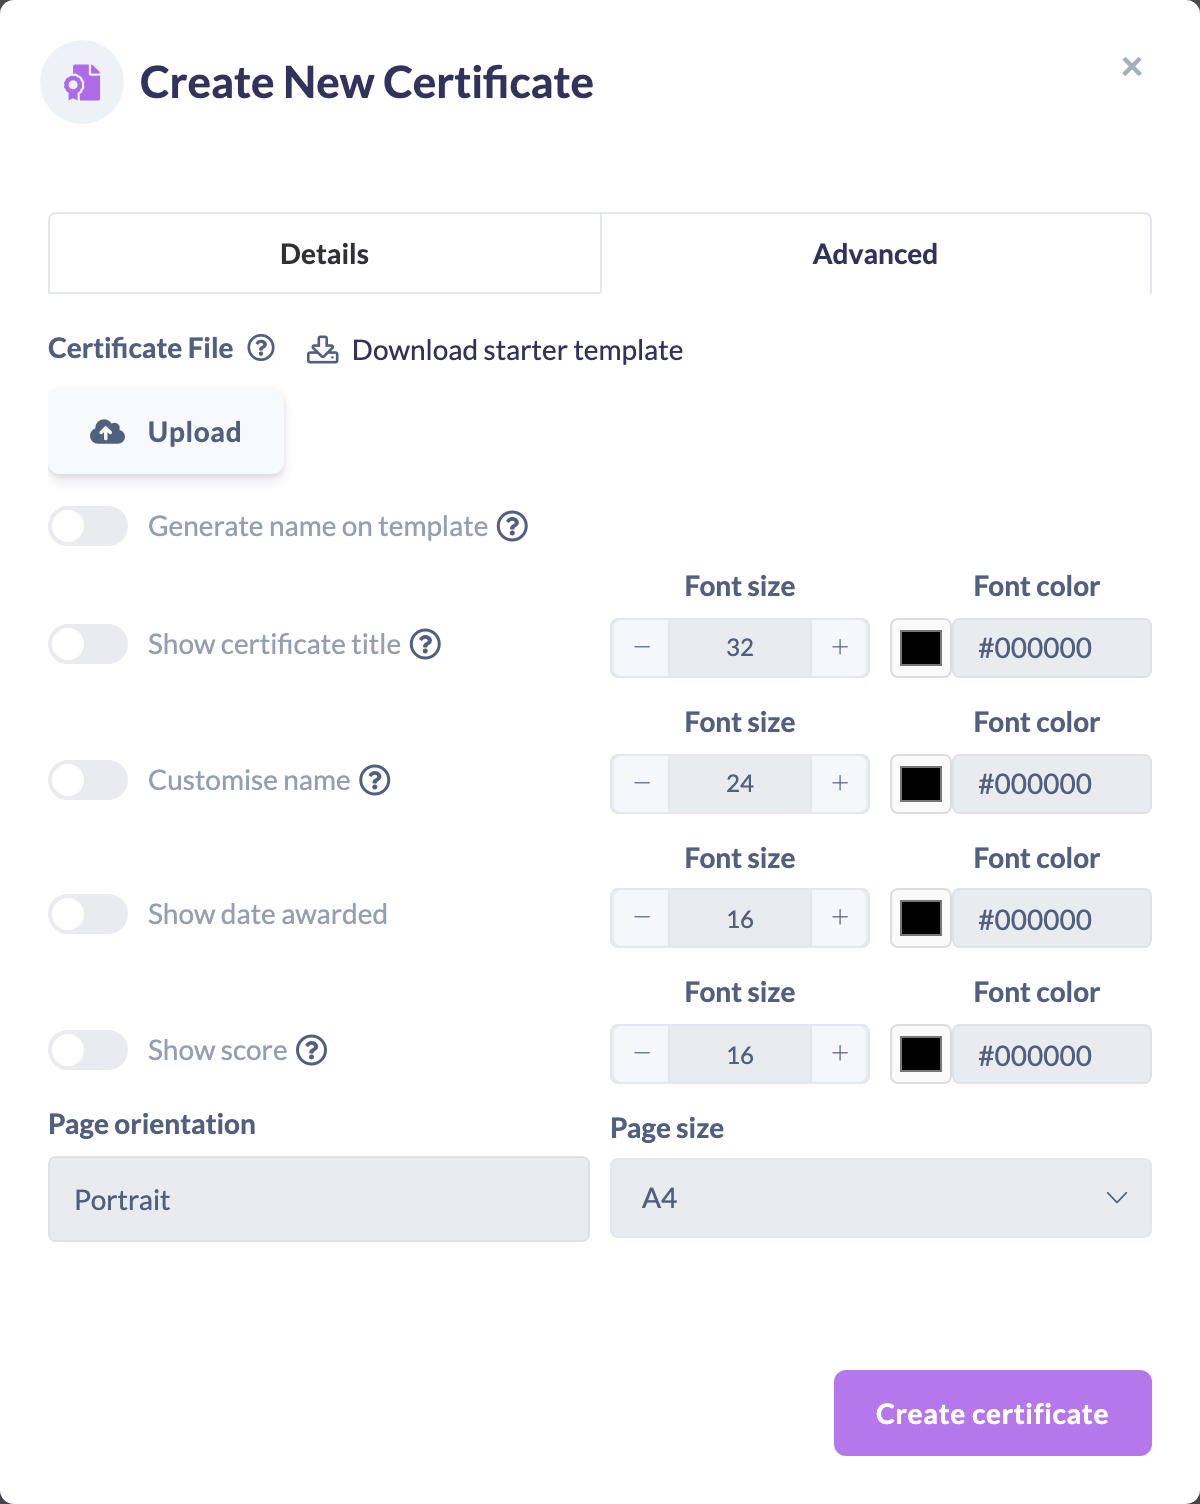
On the Advanced tab you can upload a PDF under Certificate File. This is the document the learner receives when they earn the Certificate. If you don't have a design ready, Download starter template beside that heading gives you a blank certificate to upload as-is or brand in Word first.
Once a file is uploaded, switch on Generate name on template to personalise it for each learner. You can print the certificate title, the date awarded and the score alongside the learner's name, each with its own font size and colour — the name is always printed, the other three are optional. Use Preview certificate to render a sample and check the text sits correctly on your design before saving.
For the full walkthrough, see Custom Certifications in SuperPath.
Things to keep in mind
- Only the name is required — the learning, expiry, description, provider details, image and certificate file are all optional.
- Set an expiry period (in months) only if the Certificate should lapse and need renewing; otherwise leave the expiry toggle off.
- The file you add to the Certificate File box is the one attached to the learner's record once the Certificate is awarded.
- Creating and editing Certificates needs a desktop or tablet — on a mobile device you'll be asked to switch to a larger screen.
- Select Learning is only shown to Owners and Admins.
FAQs
Do I have to attach a file?
No. Without one the Certificate still records the award against the learner; there's just no document to open.
When is the Certificate awarded?
Automatically, when the learner completes the learning it's linked to. If it isn't linked to anything, it can still be added to someone by hand — see How to Add a Certificate to a Person.
Can I change a Certificate after creating it?
Yes. Open Settings → Features → Manage Certificates, find it in the list and click the pencil icon — see How to Create, Edit or Delete a Certificate.
Where do learners see their Certificates?
On the Certificates tab of their profile, and from the completion page of the learning that awarded it.
Who can do this
Owners, Admins, Managers and Content Managers can create Certificates. People Managers, Instructors, Employees and Restricted users cannot — they can only view existing Certificates. On the API, creating a Certificate requires the create permission on Certificate; Owners, Admins, Managers and Content Managers hold manage on Certificate, which includes create.
In practice the Certificates page is reached through Settings, which only Owners and Admins can open — Managers and Content Managers create Certificates from the learning they're editing instead. Select Learning is likewise limited to Owners and Admins.
Updated on: 11/08/2026
Thank you!