
Basic Formatting for your Knowledge Articles
Basic Formatting for Your Knowledge Articles
In this article:
- Overview
- Who can do this
- Formatting text
- Adding headings and a table of contents
- Creating lists and checklists
- Aligning and indenting text
- Inserting a table
- Things to keep in mind
- FAQs
Overview
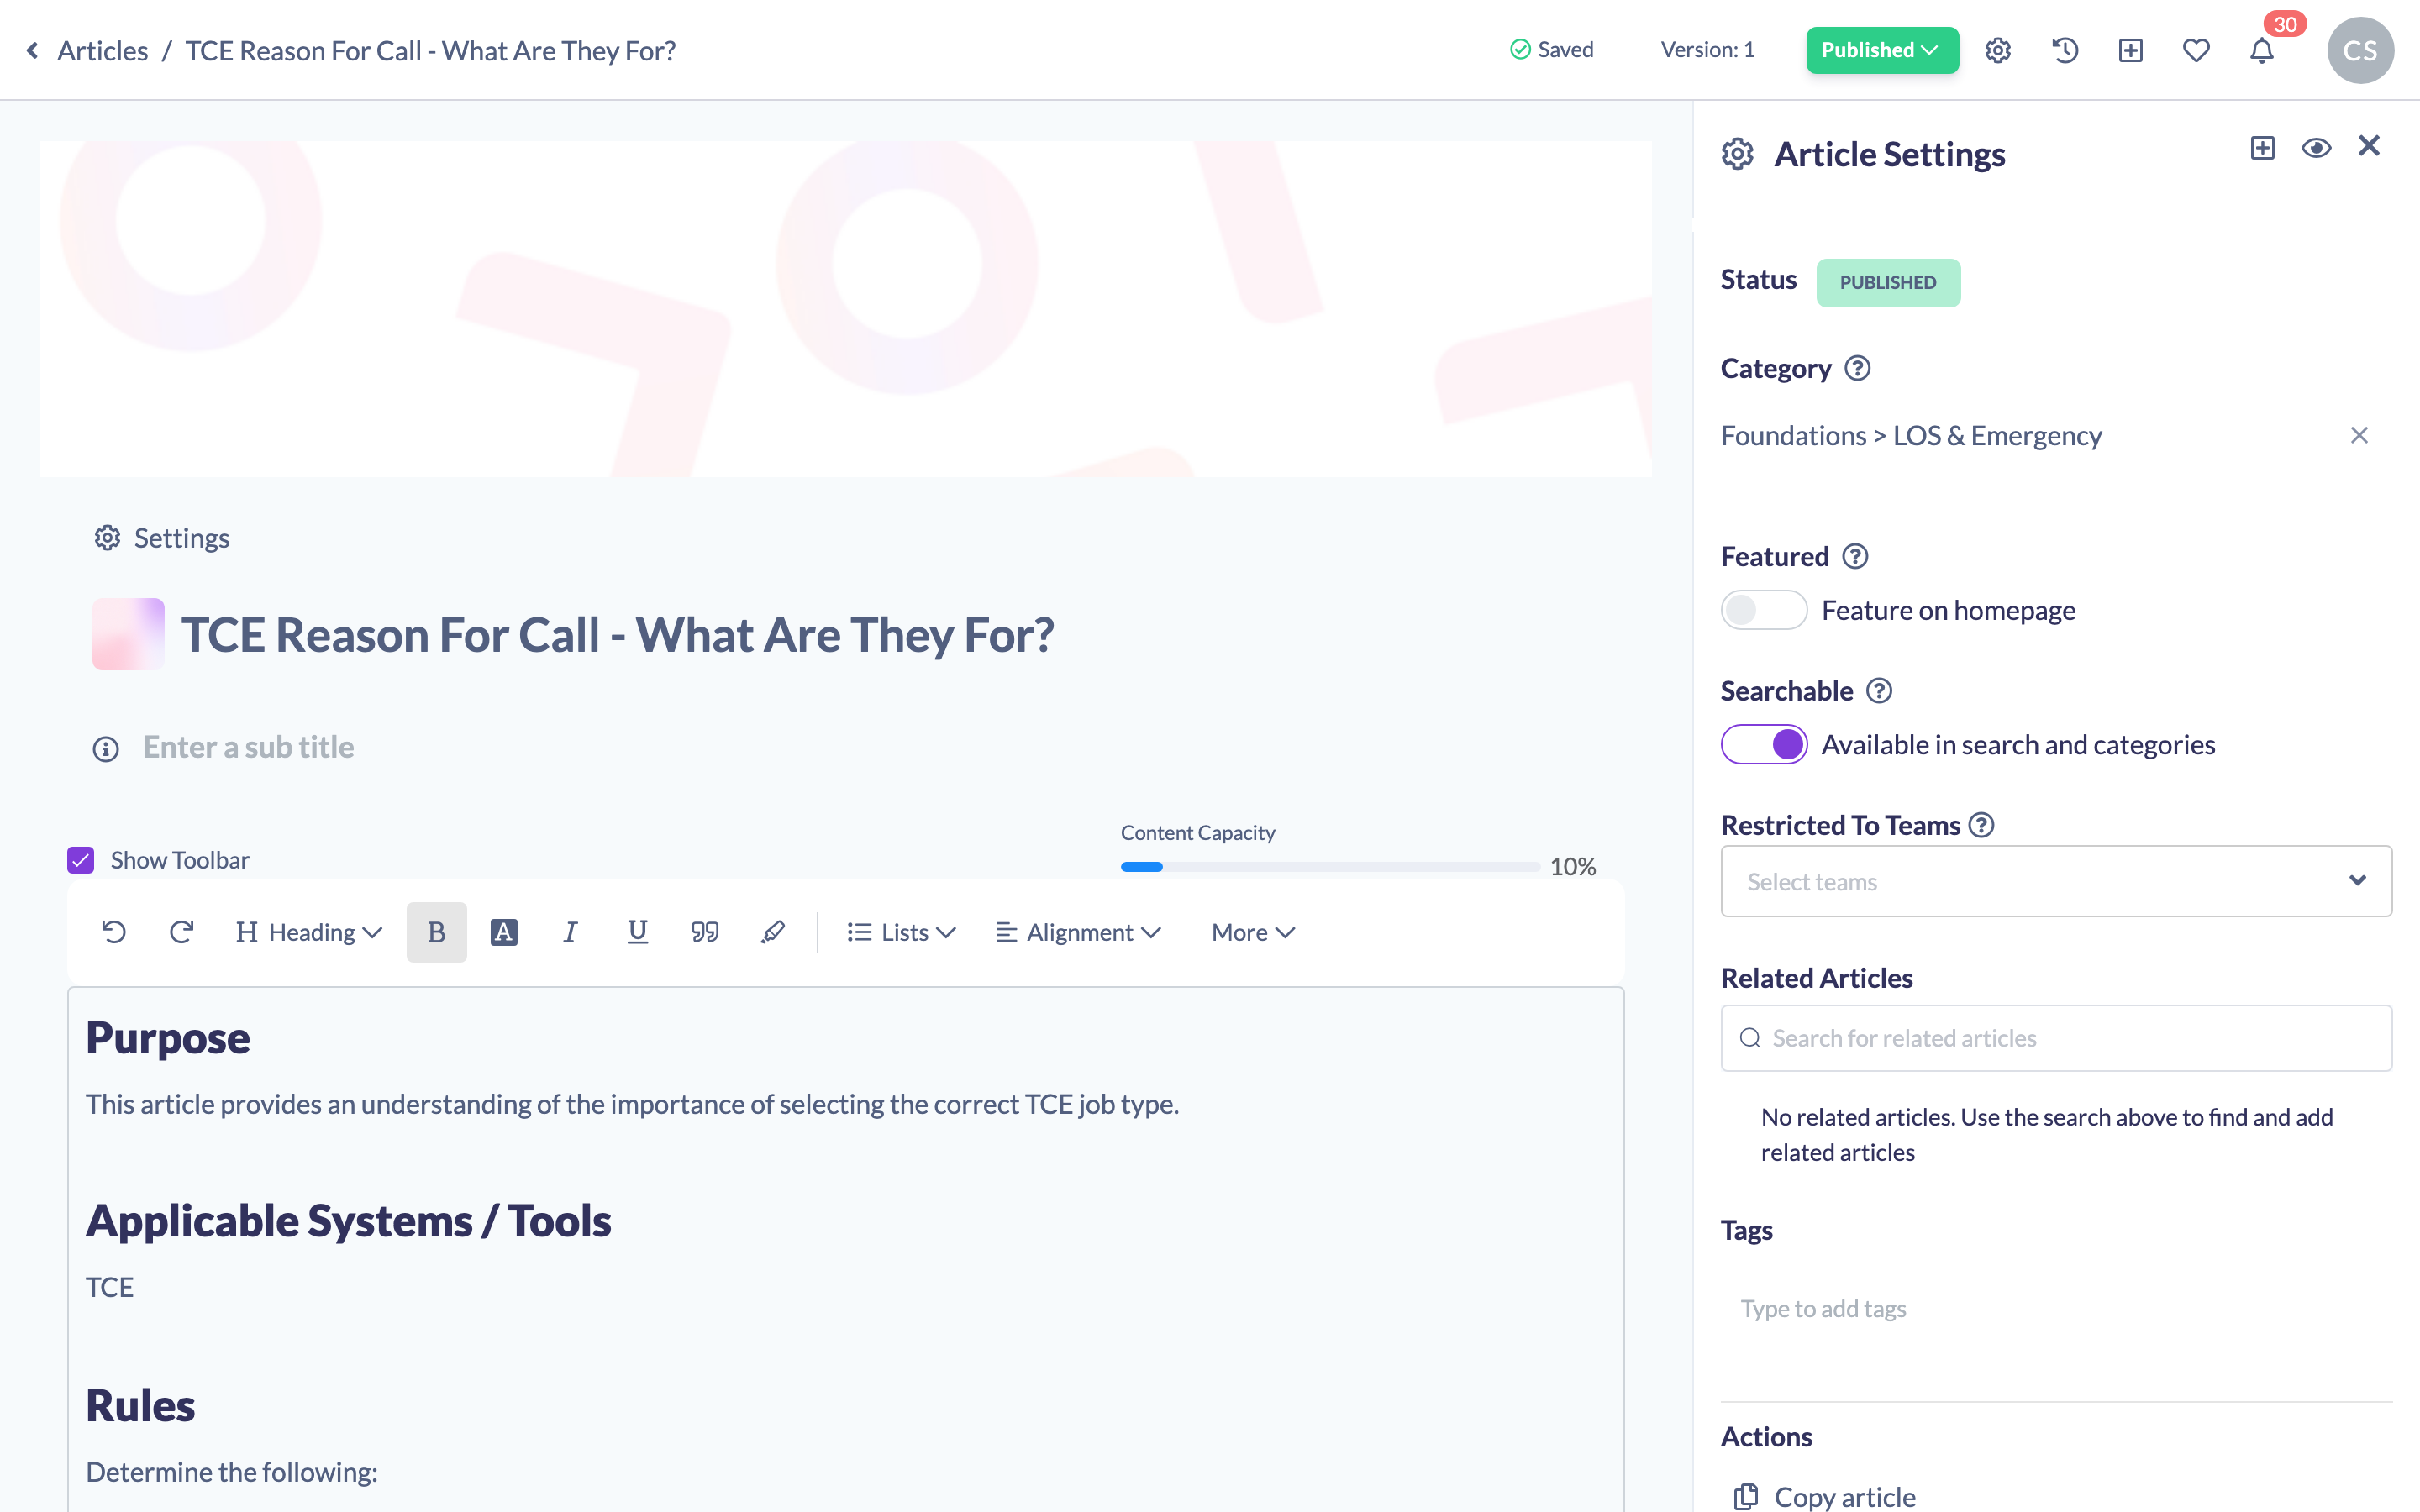
Well-structured articles are easier to read and more engaging. The Knowledge article editor gives you a formatting toolbar at the top of the content area, and a floating toolbar that appears whenever you select text. Both let you style text, add headings, build lists, align content and insert tables.
Who can do this
Owners, Admins, Managers and Content Managers can create and edit Knowledge articles. People Managers, Instructors, Employees and Restricted users have read-only access and cannot format article content.
Formatting text
Select the text you want to style, then use the toolbar or the floating toolbar that appears above your selection:
- Bold — click the bold button.
- Italic — click the italic button.
- Underline — click the underline button.
- Highlight — click the highlighter button.
- Text Colour — pick a colour from the colour swatches.
- Block Quote — turn the selected paragraph into a quote.
The floating toolbar mirrors the main toolbar's Bold, Italic, Underline, Highlight, Block Quote and dropdown controls, so you can format without moving your cursor away from the text you've selected.
Good to know: Strikethrough is available from the slash command menu — type "/" on a new line and choose Strike.
Adding headings and a table of contents
- Place your cursor on the line you want to turn into a heading.
- In the toolbar, open the Heading dropdown and choose Heading 1, Heading 2 or Heading 3.
- To add a contents list, click More in the toolbar and choose Table of Contents. It builds automatically from the headings in your article and appears under the heading "In this article".

Note: When someone reads the article, clicking a heading in the table of contents jumps them straight to that section.
Creating lists and checklists
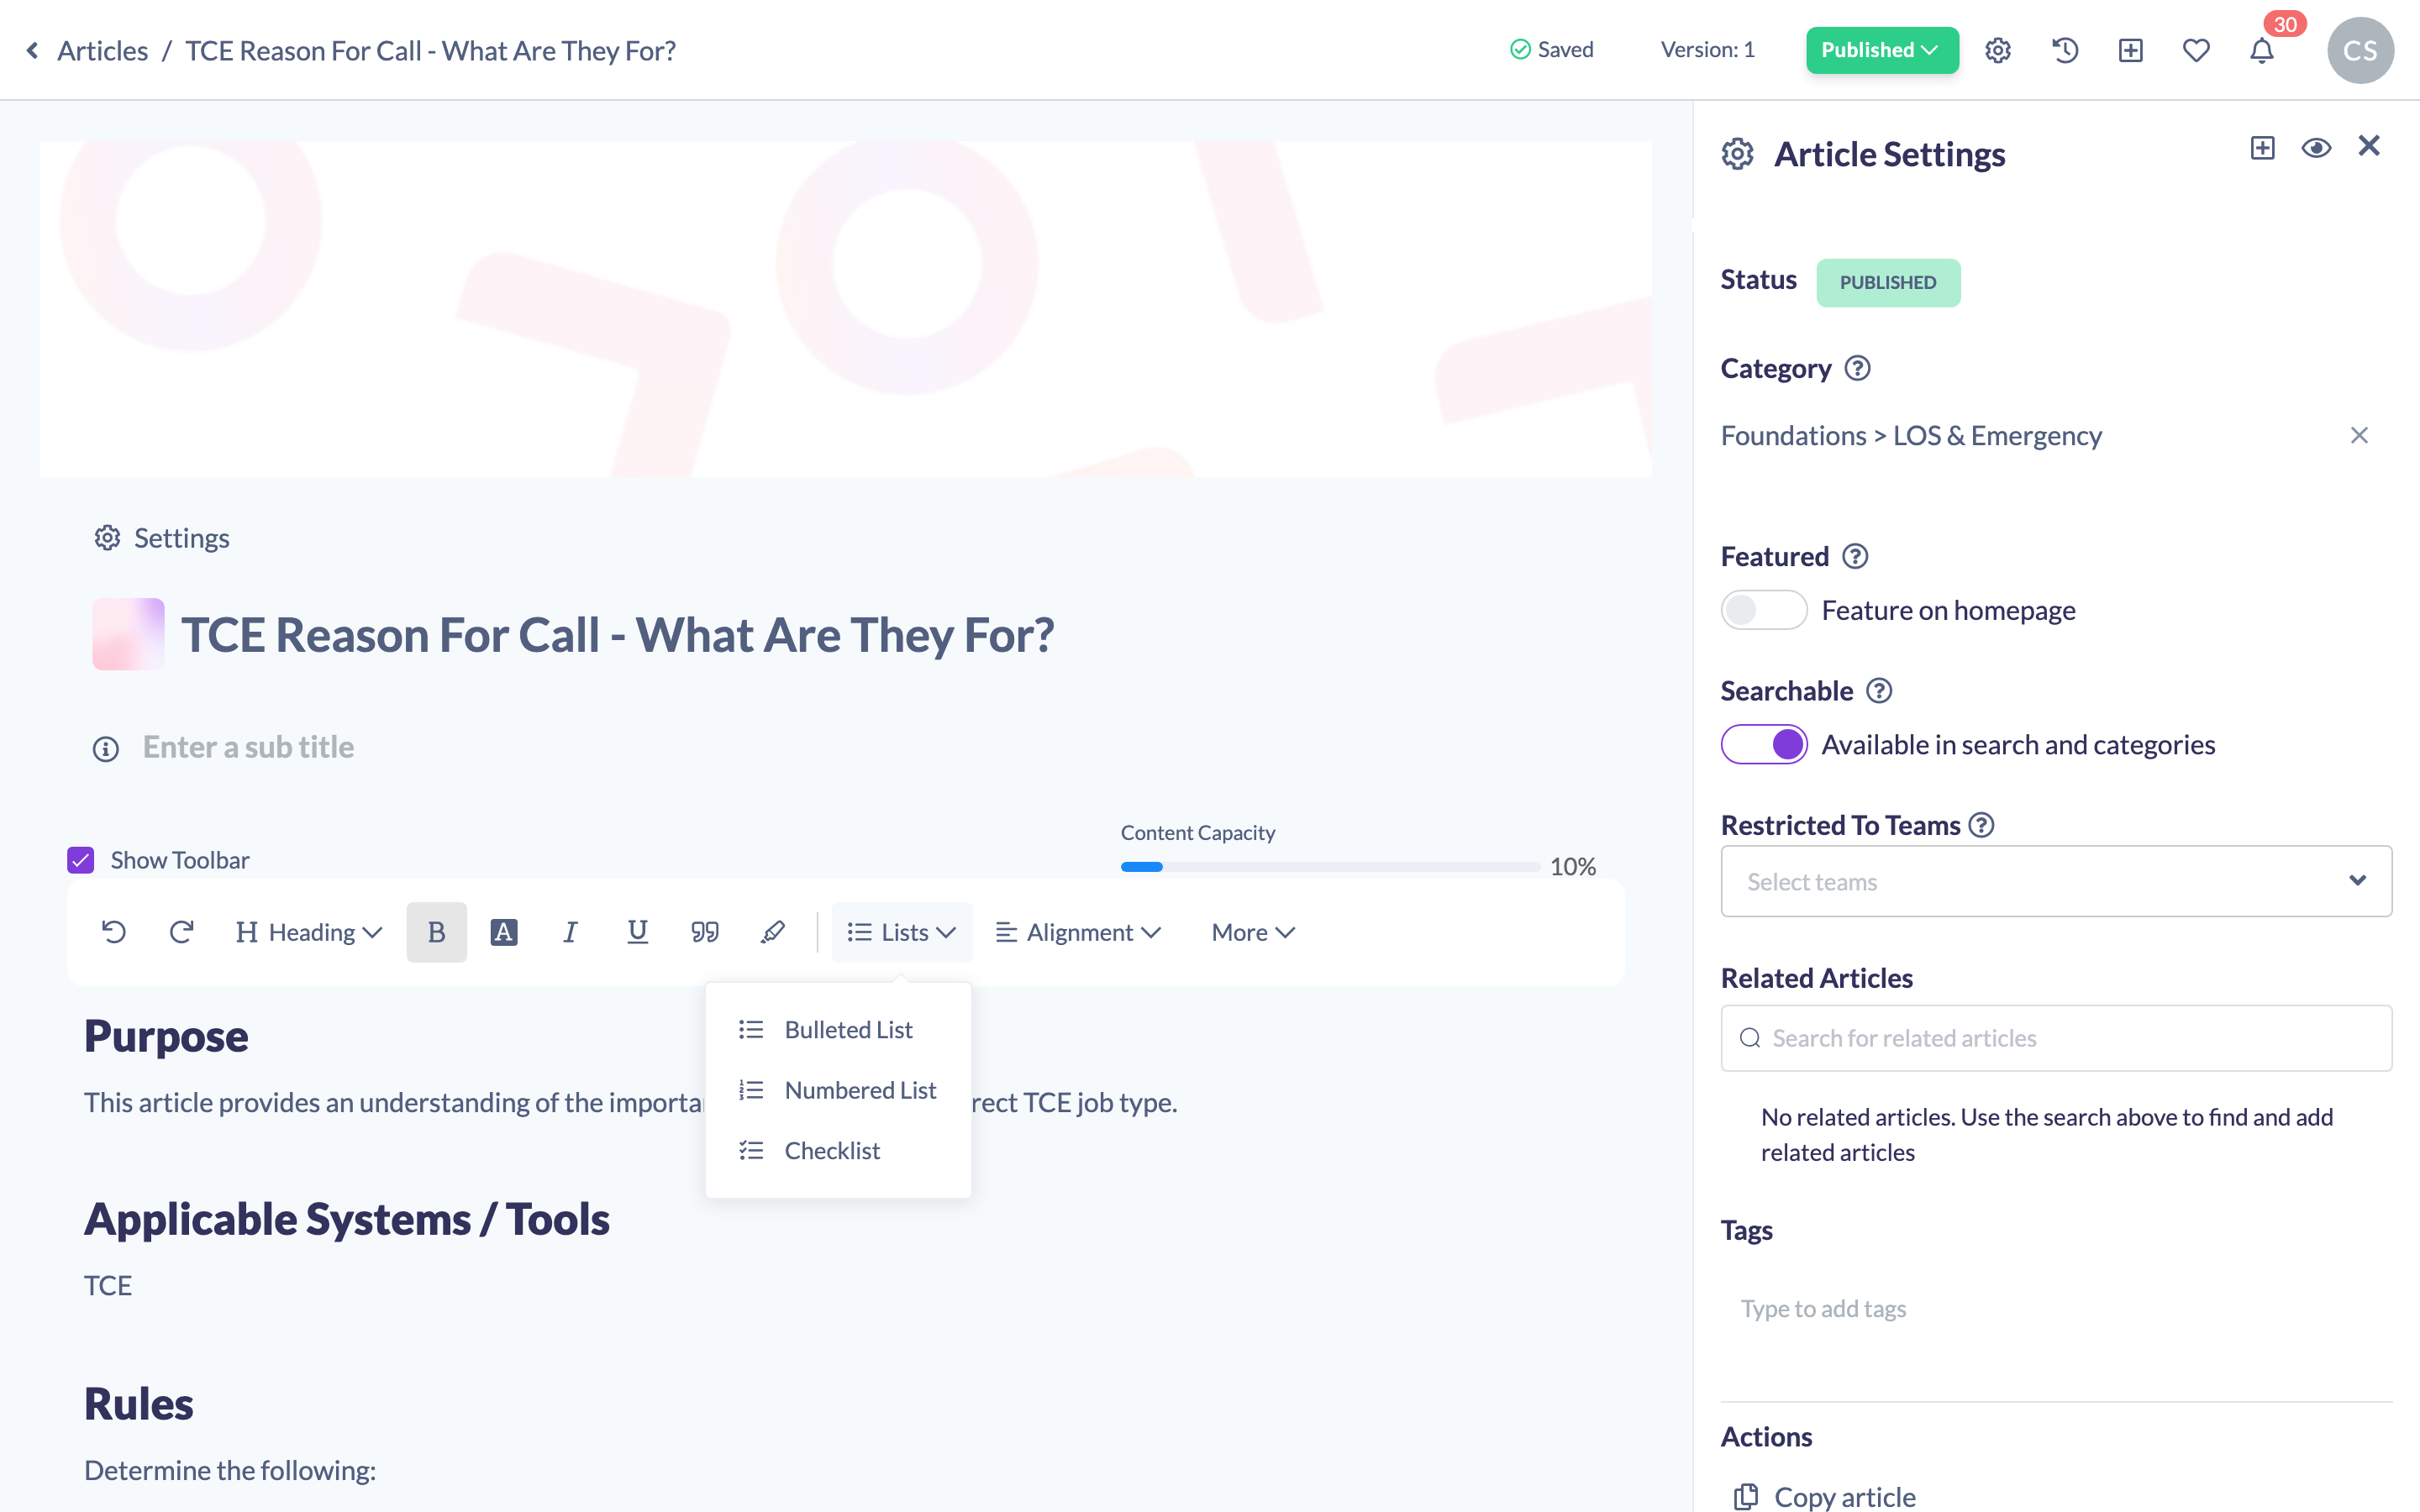
- In the toolbar, open the Lists dropdown.
- Choose Bulleted List, Numbered List or Checklist.
- A checklist adds clickable tick boxes — readers (and you) can tick items off as they go.
Aligning and indenting text
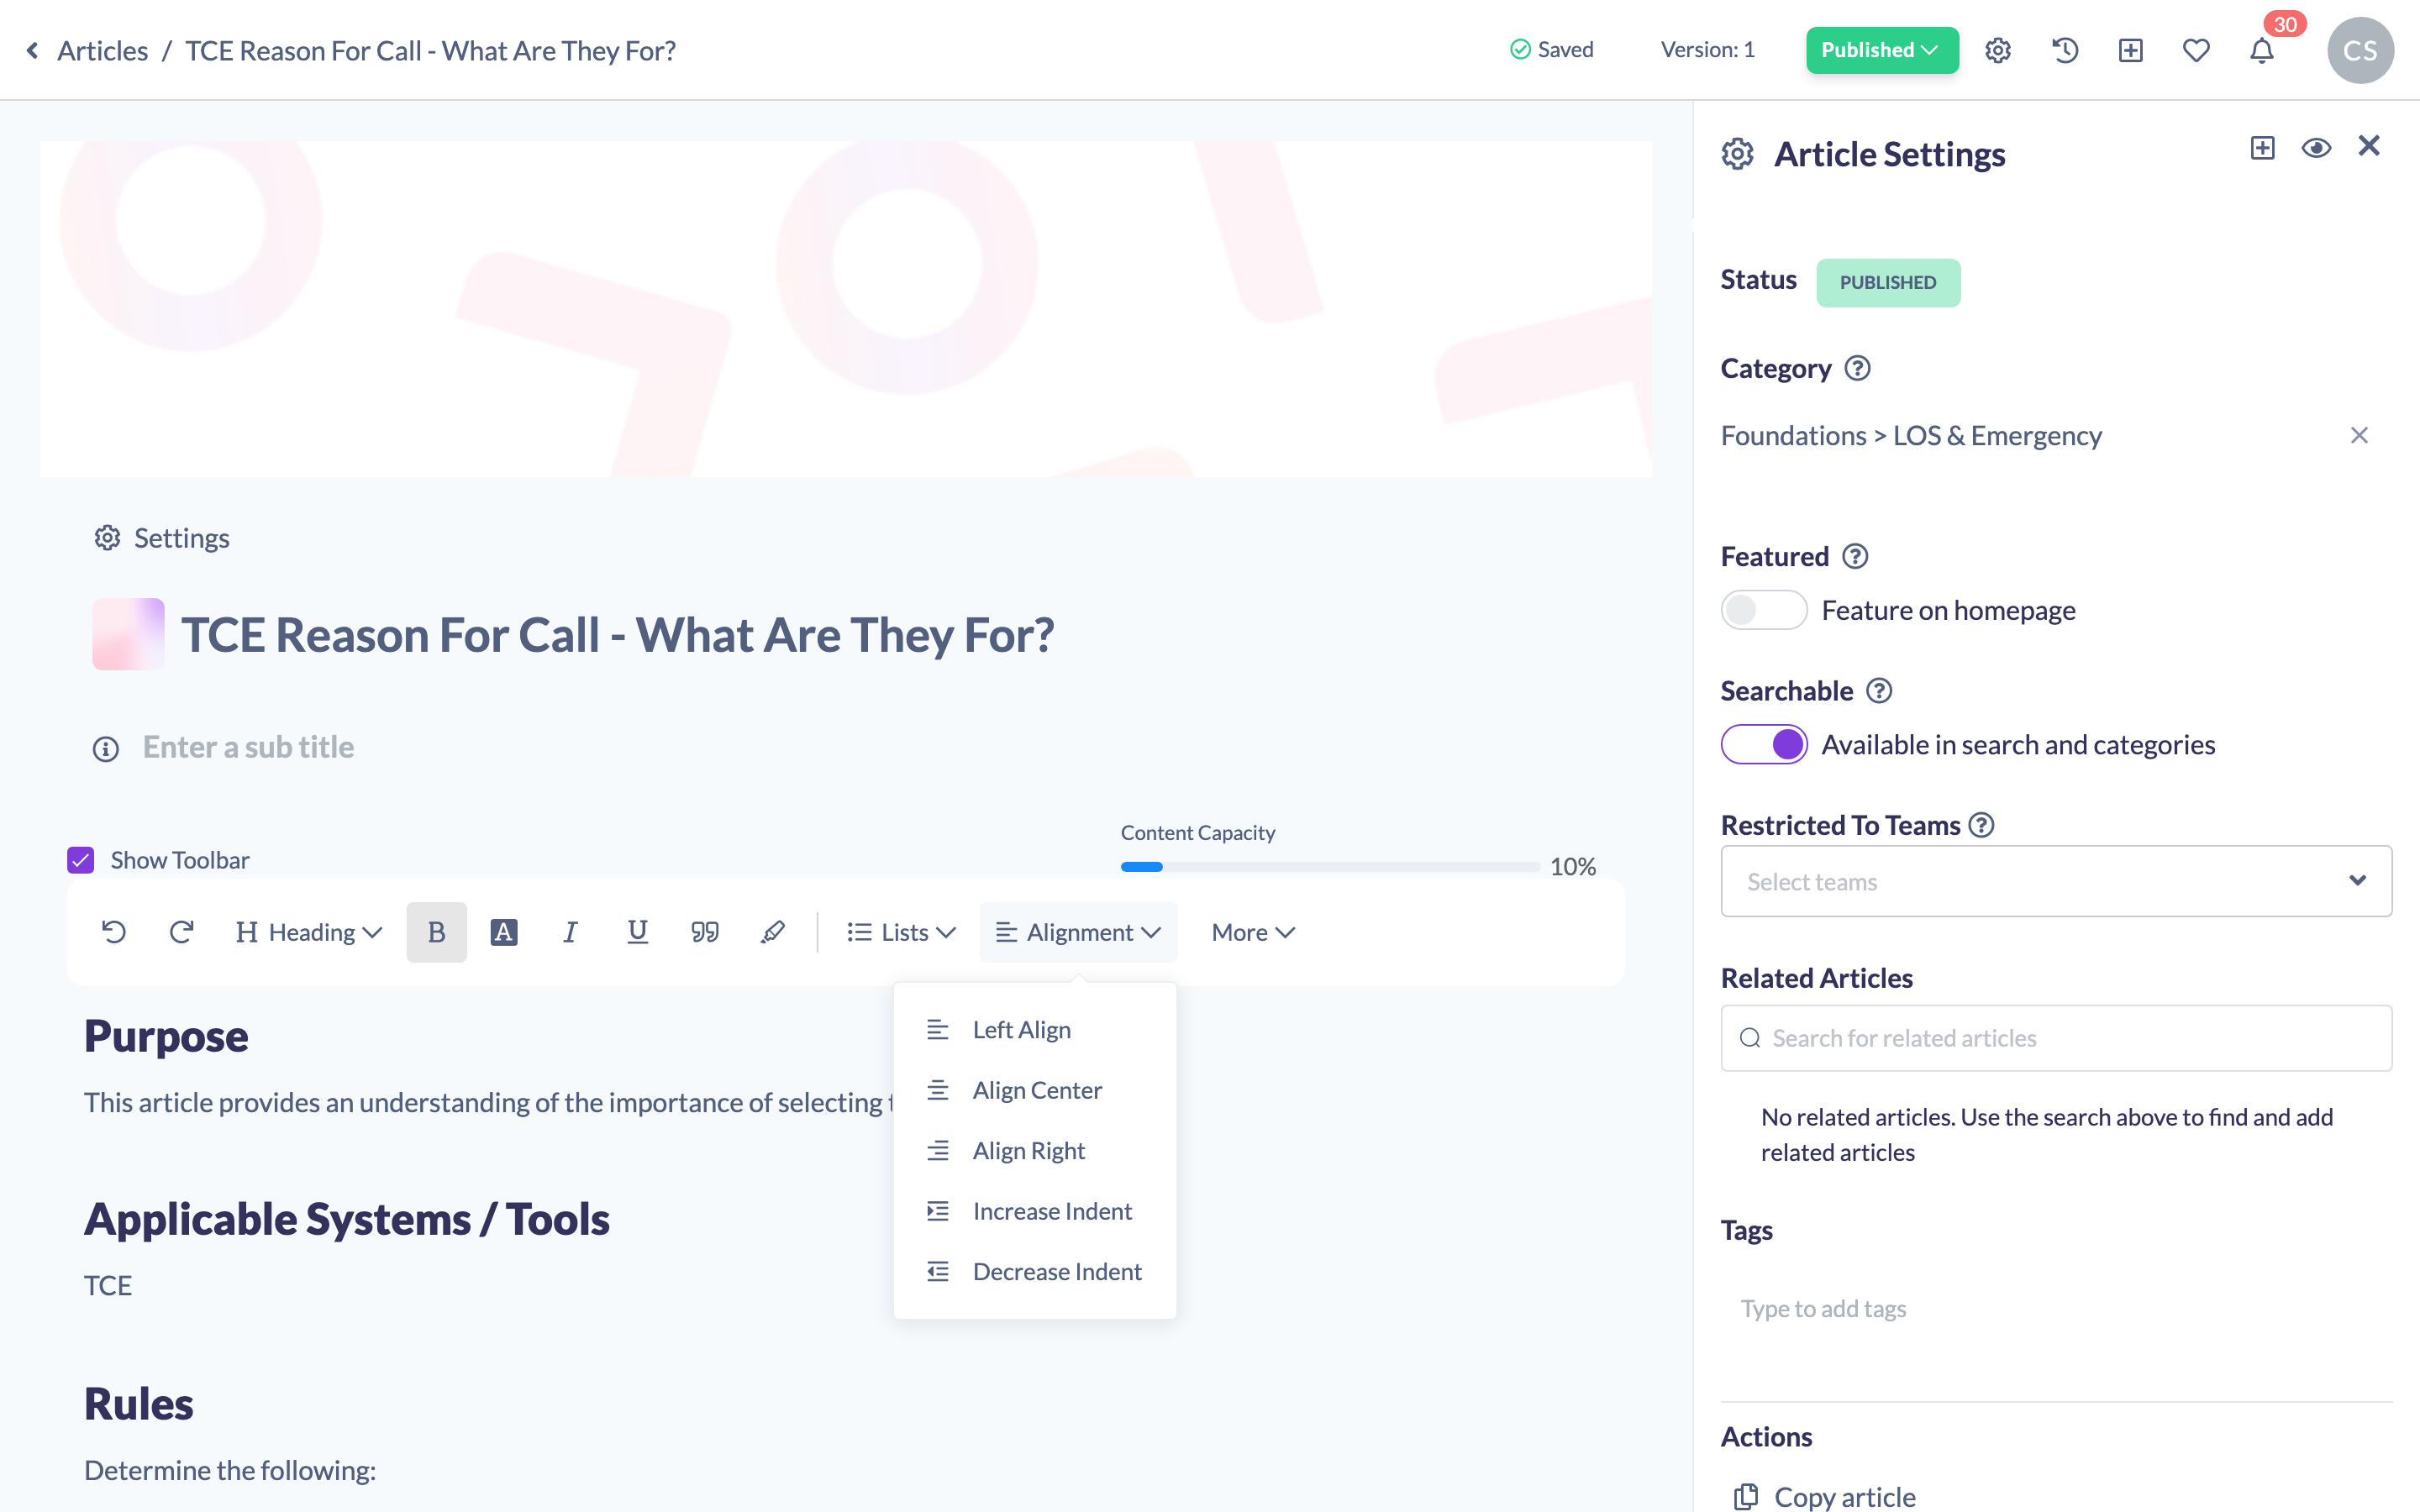
- Open the Alignment dropdown in the toolbar.
- Choose Left Align, Align Center or Align Right, or use Increase Indent and Decrease Indent to shift text in and out.
Inserting a table
- Place your cursor where you want the table.
- Click More in the toolbar and choose Table. A table with a header row is added, ready for you to type into.
Things to keep in mind
- The toolbar is responsive: on narrower screens some controls collapse into a More dropdown, but everything is still available.
- The floating toolbar only appears once you have text selected.
- Headings drive the table of contents, so use them consistently to keep long articles easy to navigate.
FAQs
Where is the strikethrough option?
Strikethrough isn't on the toolbar. Type "/" on a new line to open the slash command menu, then choose Strike.
How does the table of contents stay up to date?
It's generated from your Heading 1, 2 and 3 lines, so it updates as you add or rename headings.
Updated on: 25/07/2026
Thank you!