
Inserting Cover Images
Inserting Cover Images
In this article:
- Overview
- Add or change a cover image
- Adjust the cover position
- Publish your changes
- Things to keep in mind
- FAQs
- Who can do this
Overview
A cover image is the wide banner that appears at the top of a Knowledge Article, giving it a more polished, branded look. Every article shows a default cover to begin with, which you can replace with an image from Unsplash, your asset Library or Canva, or one you upload yourself. This article explains how to add or change a cover, adjust how it sits, and publish the change.
Add or change a cover image
- Open the Knowledge Article you want to edit so it loads in the editor. The cover banner sits at the very top of the article.
- Hover over the cover area and click the options menu (the … icon) that appears.
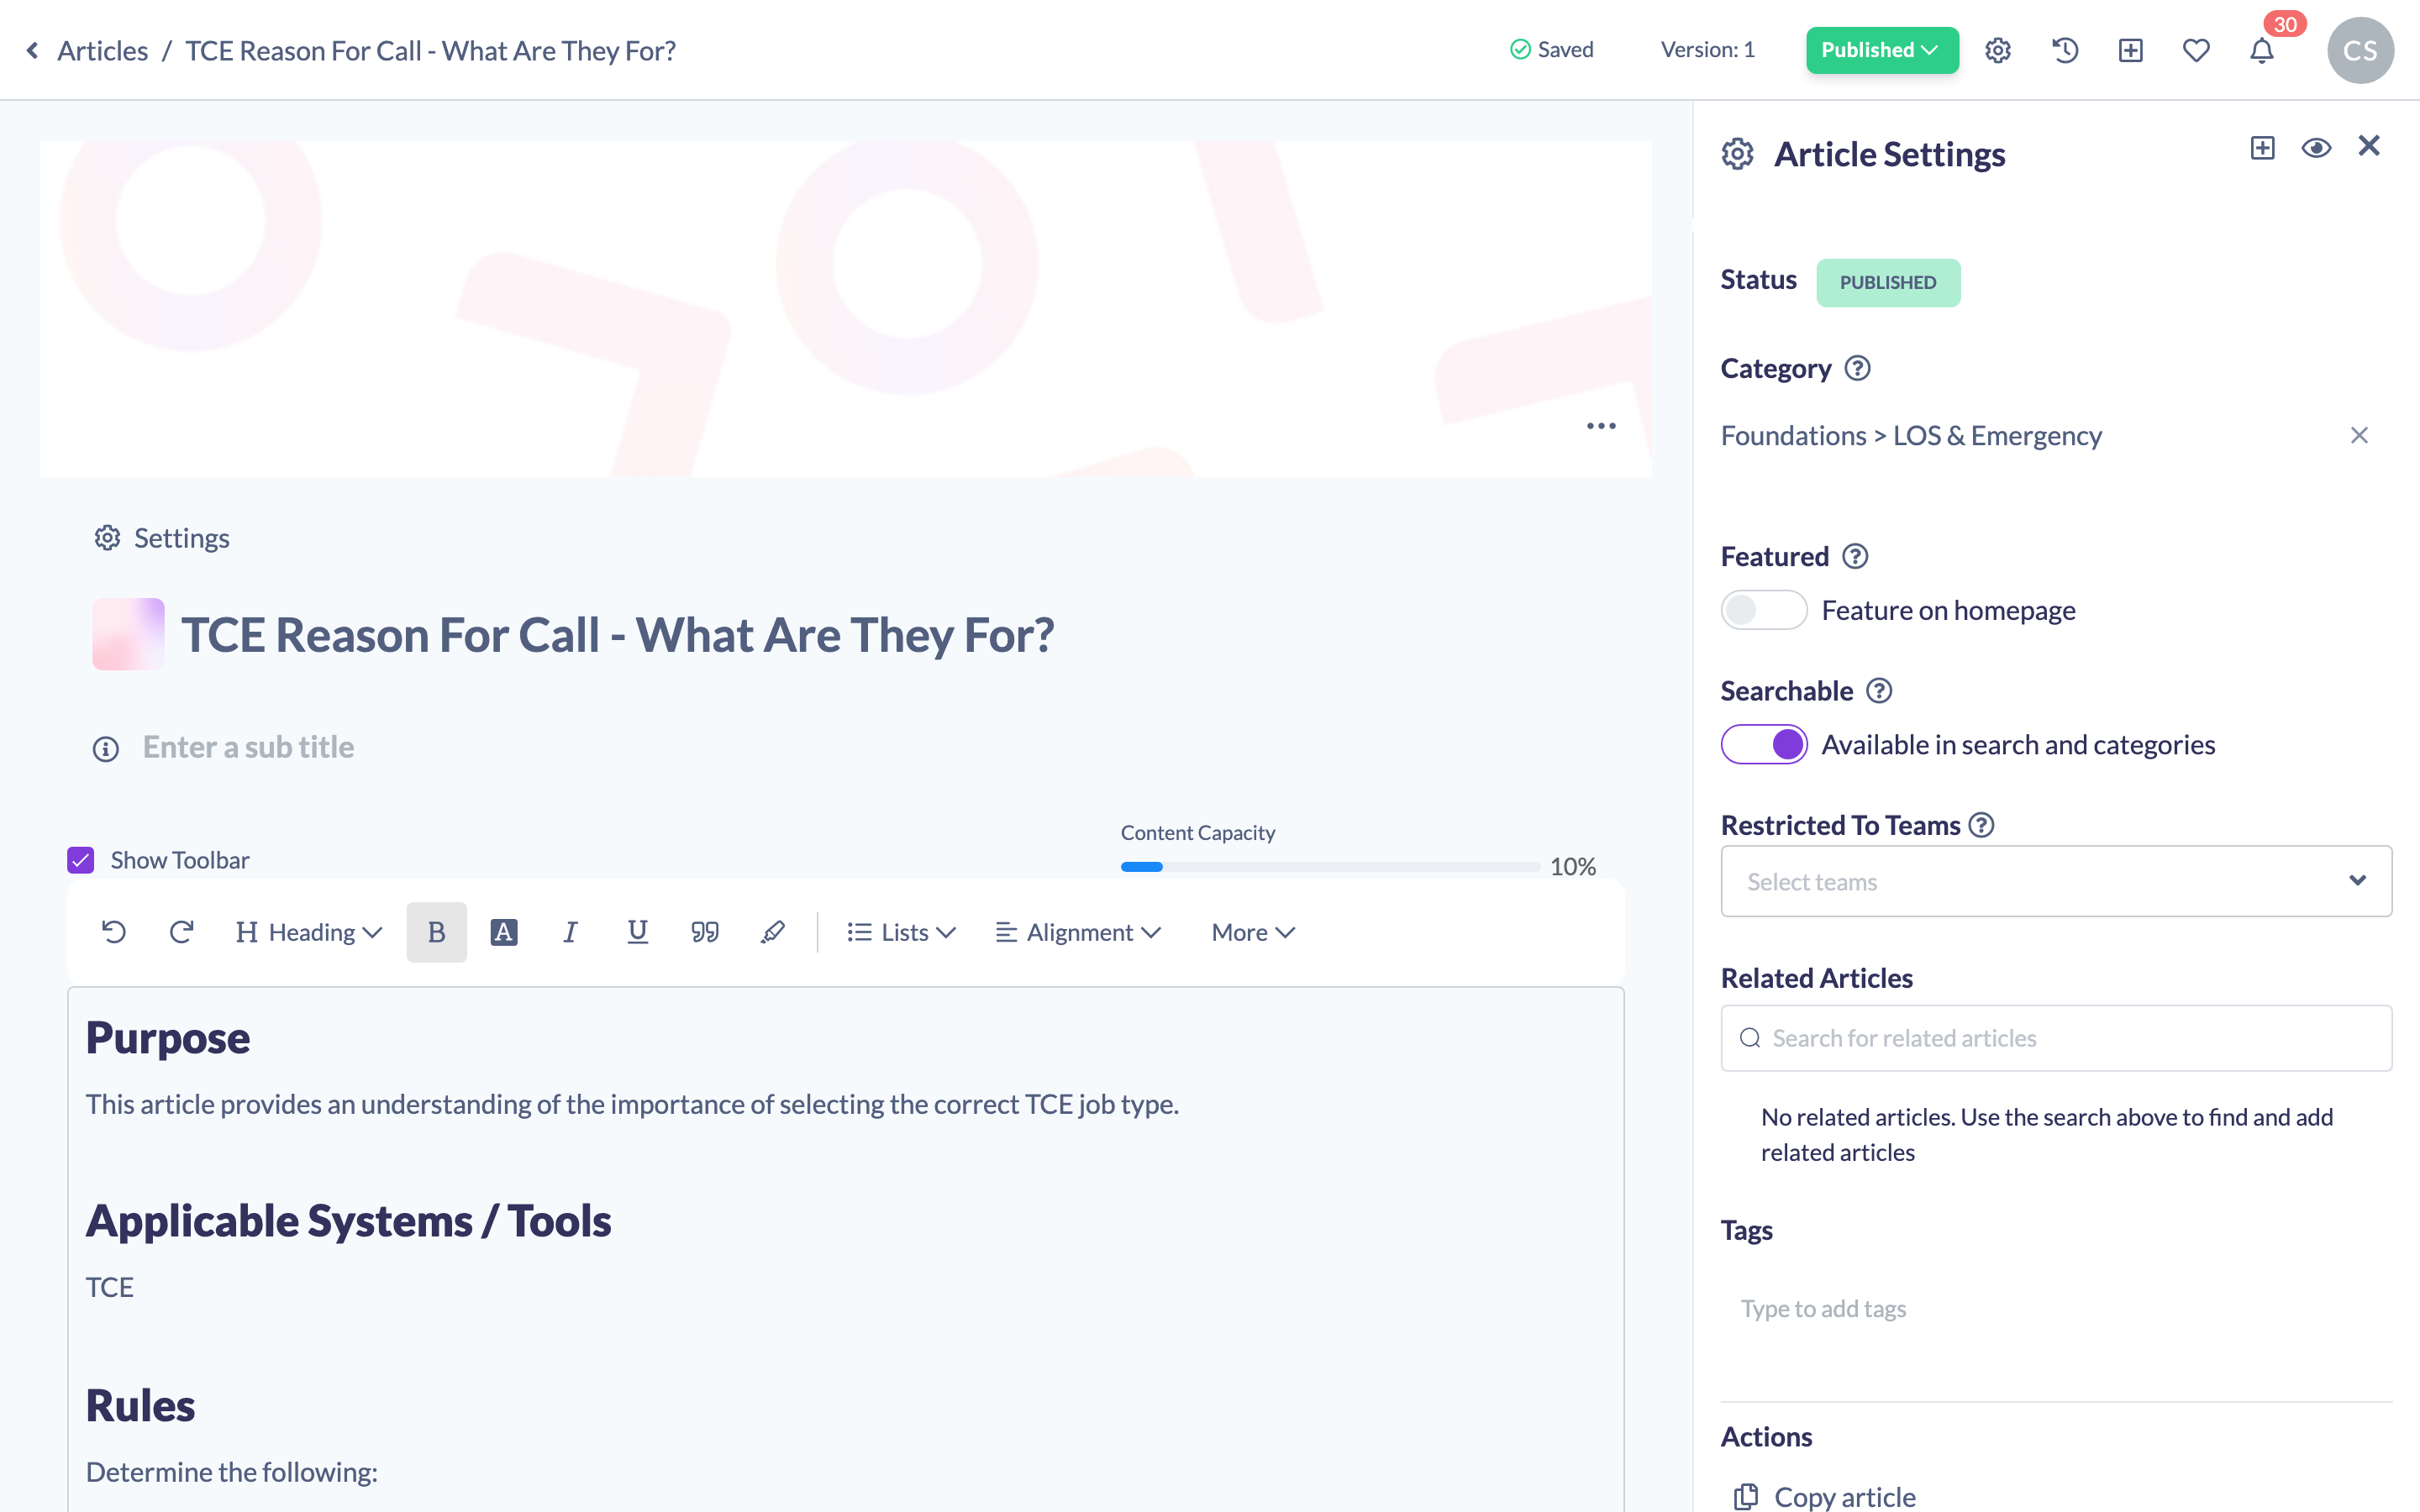
- Choose where your image comes from:
- Upload an image — upload your own image from your device (JPEG, JPG or PNG).
- Choose from Unsplash — search Unsplash for a free stock image.
- Choose from Library — pick an image already saved in your asset Library.
- Choose from Canva — import a design from Canva (shown only if Canva is connected to your account).
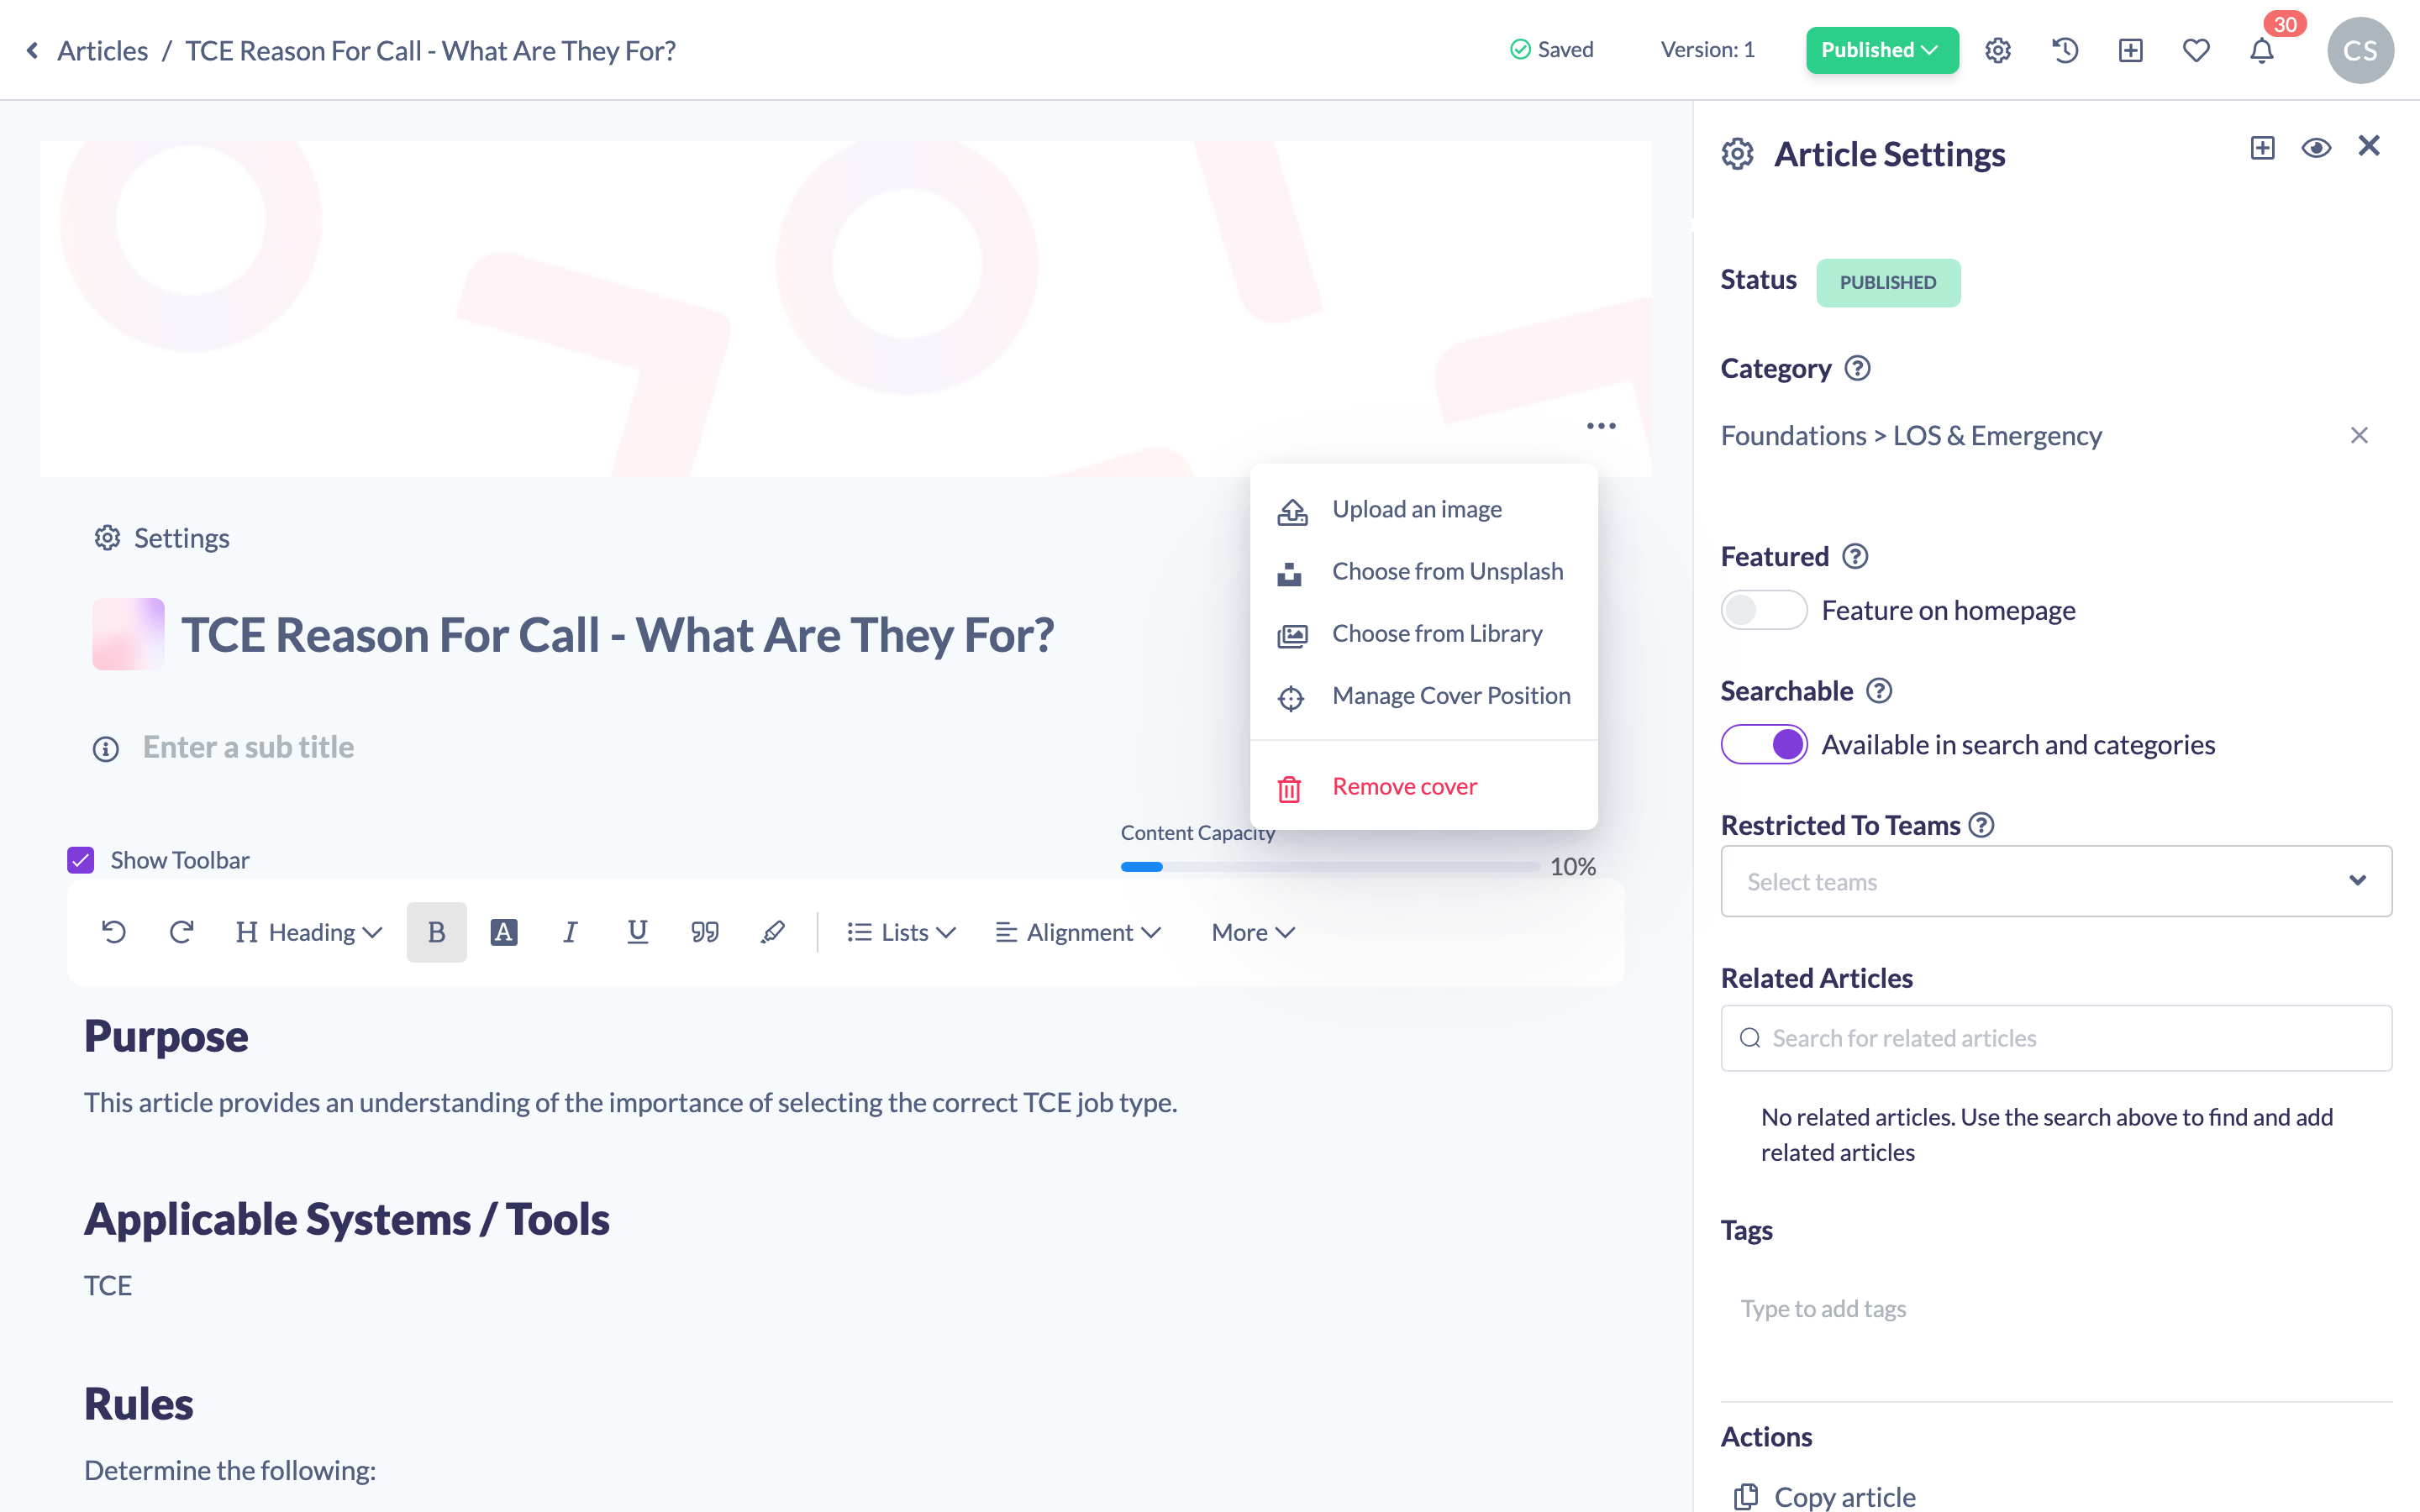
- Select your image. The cover updates immediately and your change saves automatically.
Adjust the cover position
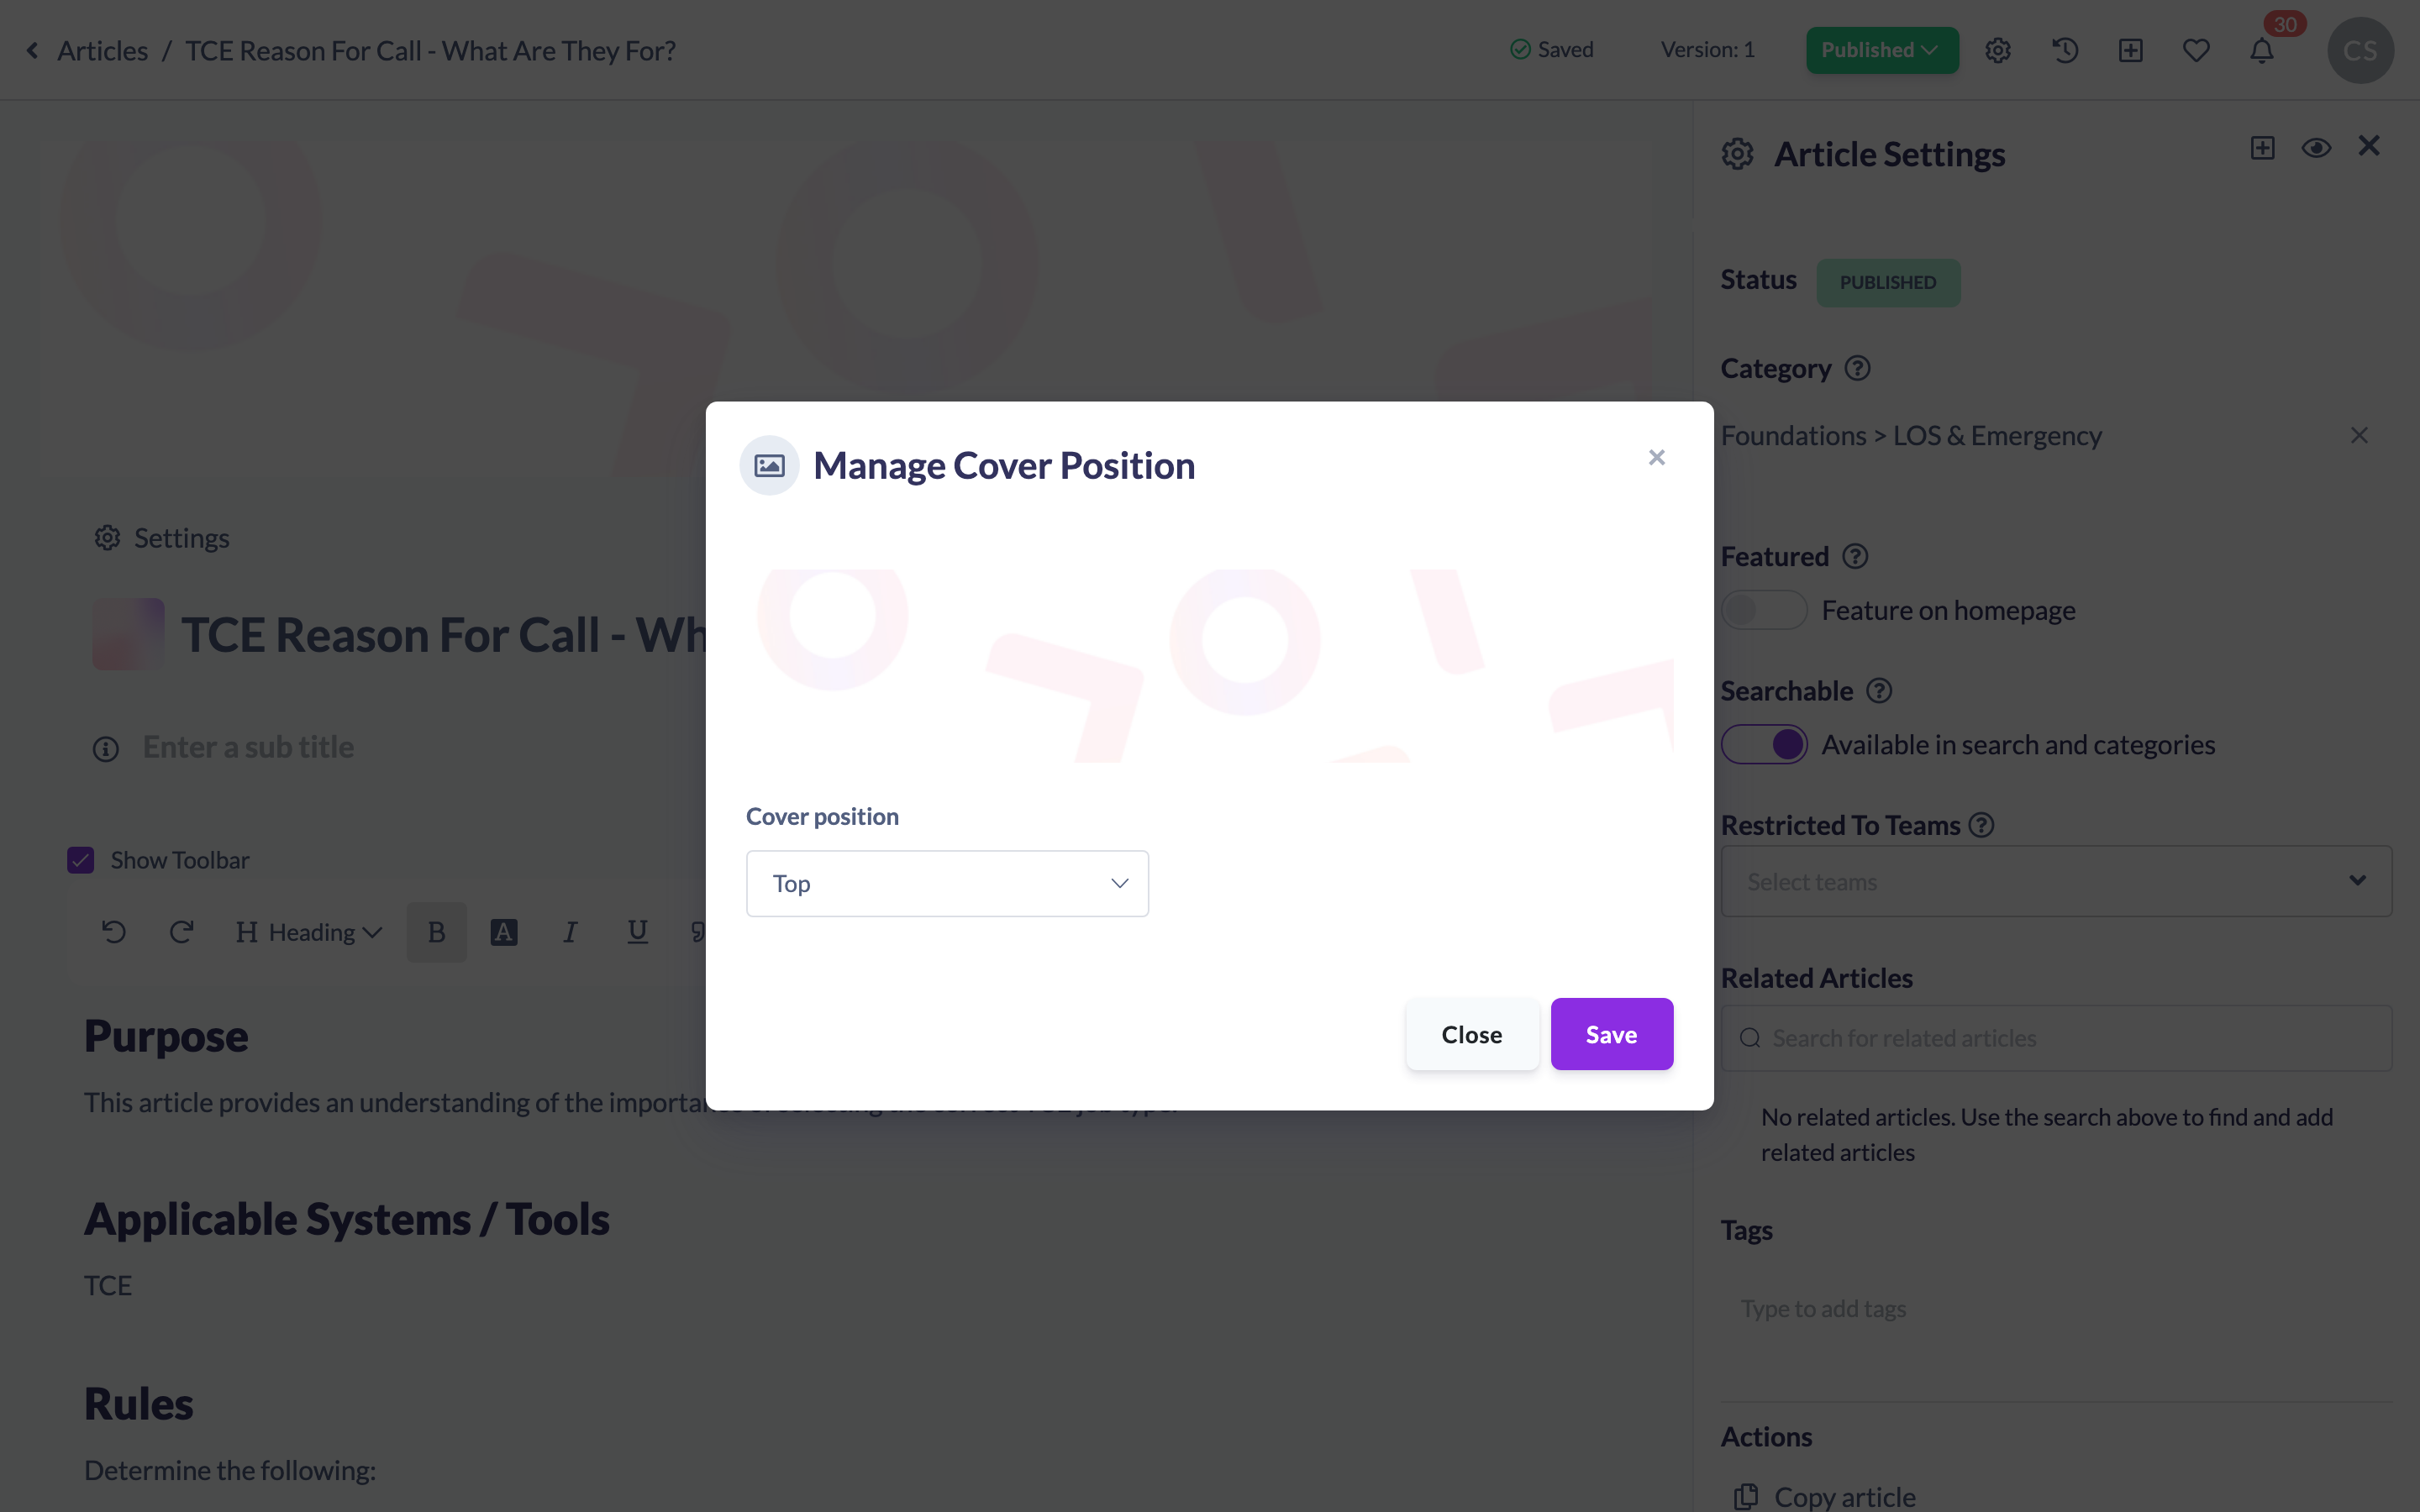
If the image needs repositioning within the banner, hover over the cover, open the … options menu again and click Manage Cover Position. You can set the image to sit at the top, centre or bottom of the banner, then save.
Publish your changes
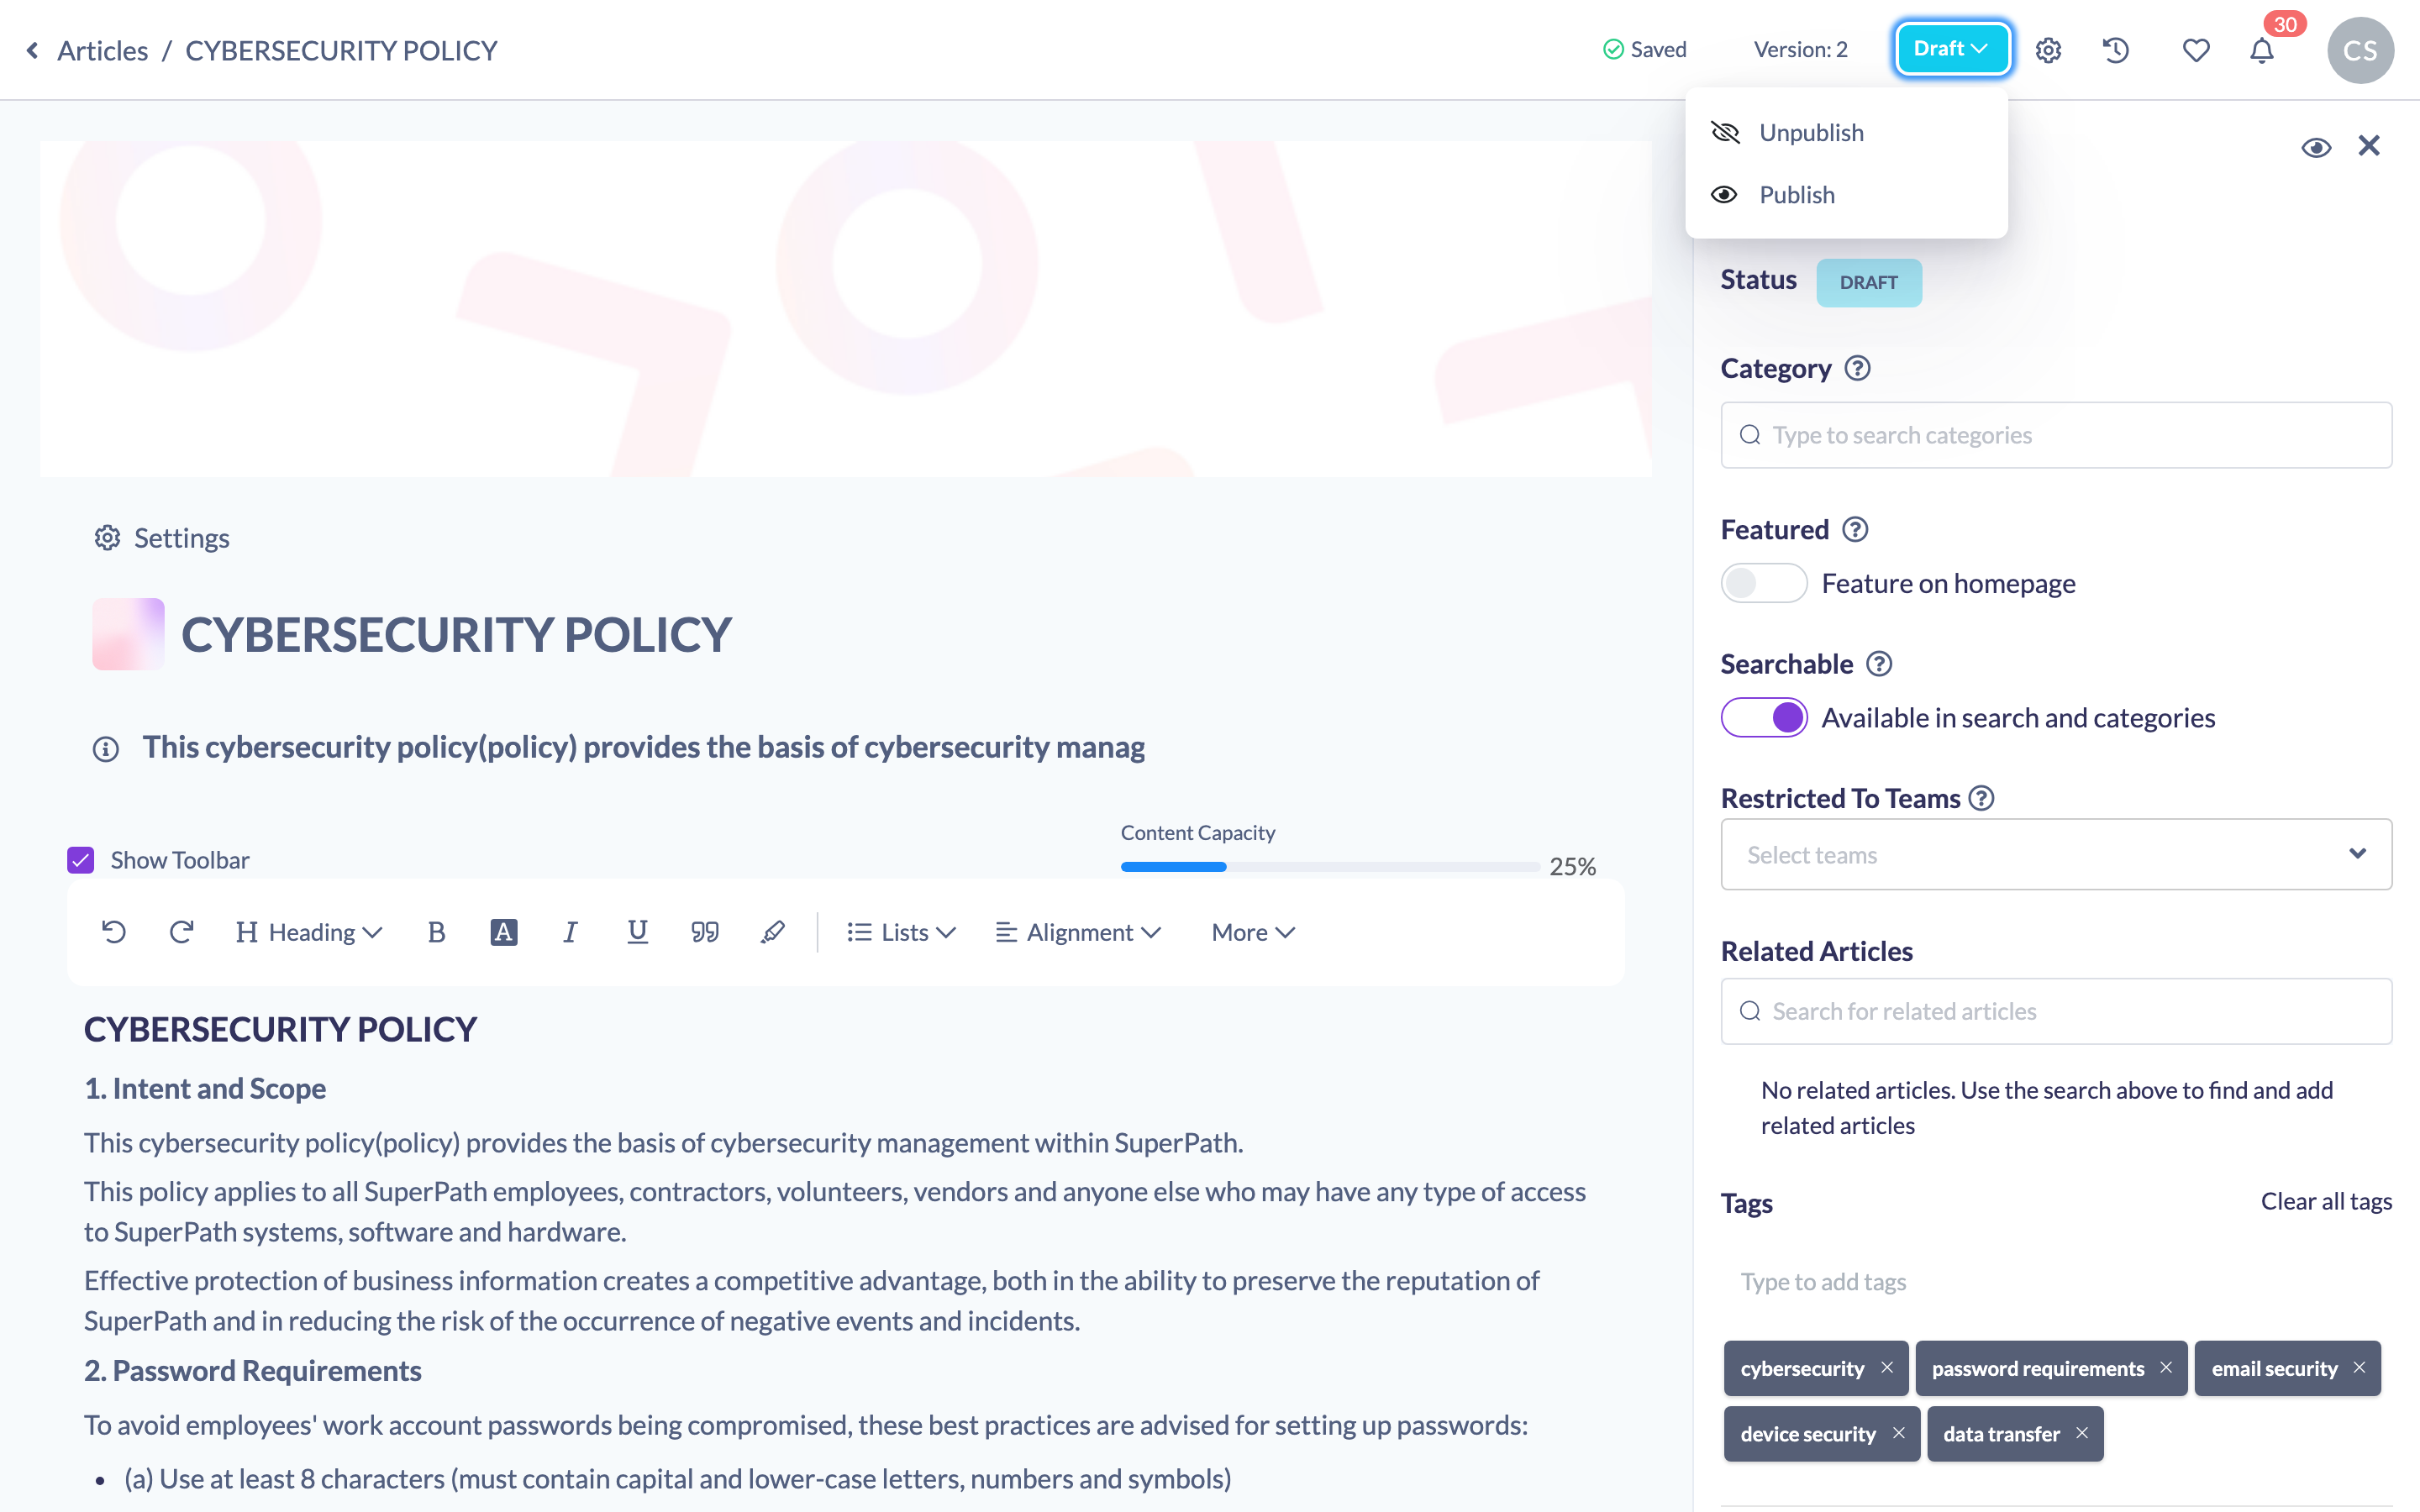
Adding a cover to an already-published article saves the change to a draft, so the live version won't update until you re-publish. Use the status button in the top navigation of the editor to publish. See How to Publish a Knowledge Article for how the Published, Unpublished and Draft states work.
Good to know: The cover is the wide banner across the top of the article. It's separate from the article's thumbnail (the small image shown next to the title), which you set from the title area.
Things to keep in mind
- Every article starts with a default cover, so there's always a banner in place until you choose your own image.
- Uploaded covers must be a JPEG, JPG or PNG file.
- To go back to the default banner, open the … options menu on the cover and click Remove cover.
- The Choose from Canva option only appears if Canva is connected to your account.
FAQs
Can I use my own image as a cover?
Yes. Open the cover options menu, click Upload an image, and select a JPEG, JPG or PNG file from your device.
Where can cover images come from?
From Unsplash, your asset Library, Canva (if connected), or an image you upload yourself.
How do I remove a cover image?
Hover over the cover, open the … options menu and click Remove cover. The article reverts to the default banner.
Will adding a cover make my changes go live?
Not on its own. If the article is already published, your change is held in a draft — you'll need to re-publish the article for the new cover to appear to learners.
Who can do this
Owners, Admins, Managers and Content Managers can edit Knowledge Articles and add or change cover images. People Managers, Instructors, Employees and Restricted users have read-only access to Knowledge and cannot.
Updated on: 25/07/2026
Thank you!